A lot of people who are unaware of what polling rates are end up buying the wrong mouse that will effectively be detrimental to their in-game performance. Here’s everything you need to know about polling rates of gaming mice below.
What is Polling Rate?
Polling rate is the frequency at which your device sends information to the computer. In gaming mouse terms, it represents how often the mouse reports back position and tracking data.
Polling rate is measured in Hz and can vary from 125Hz to over 1000Hz depending on the brand and model of the mouse in question.
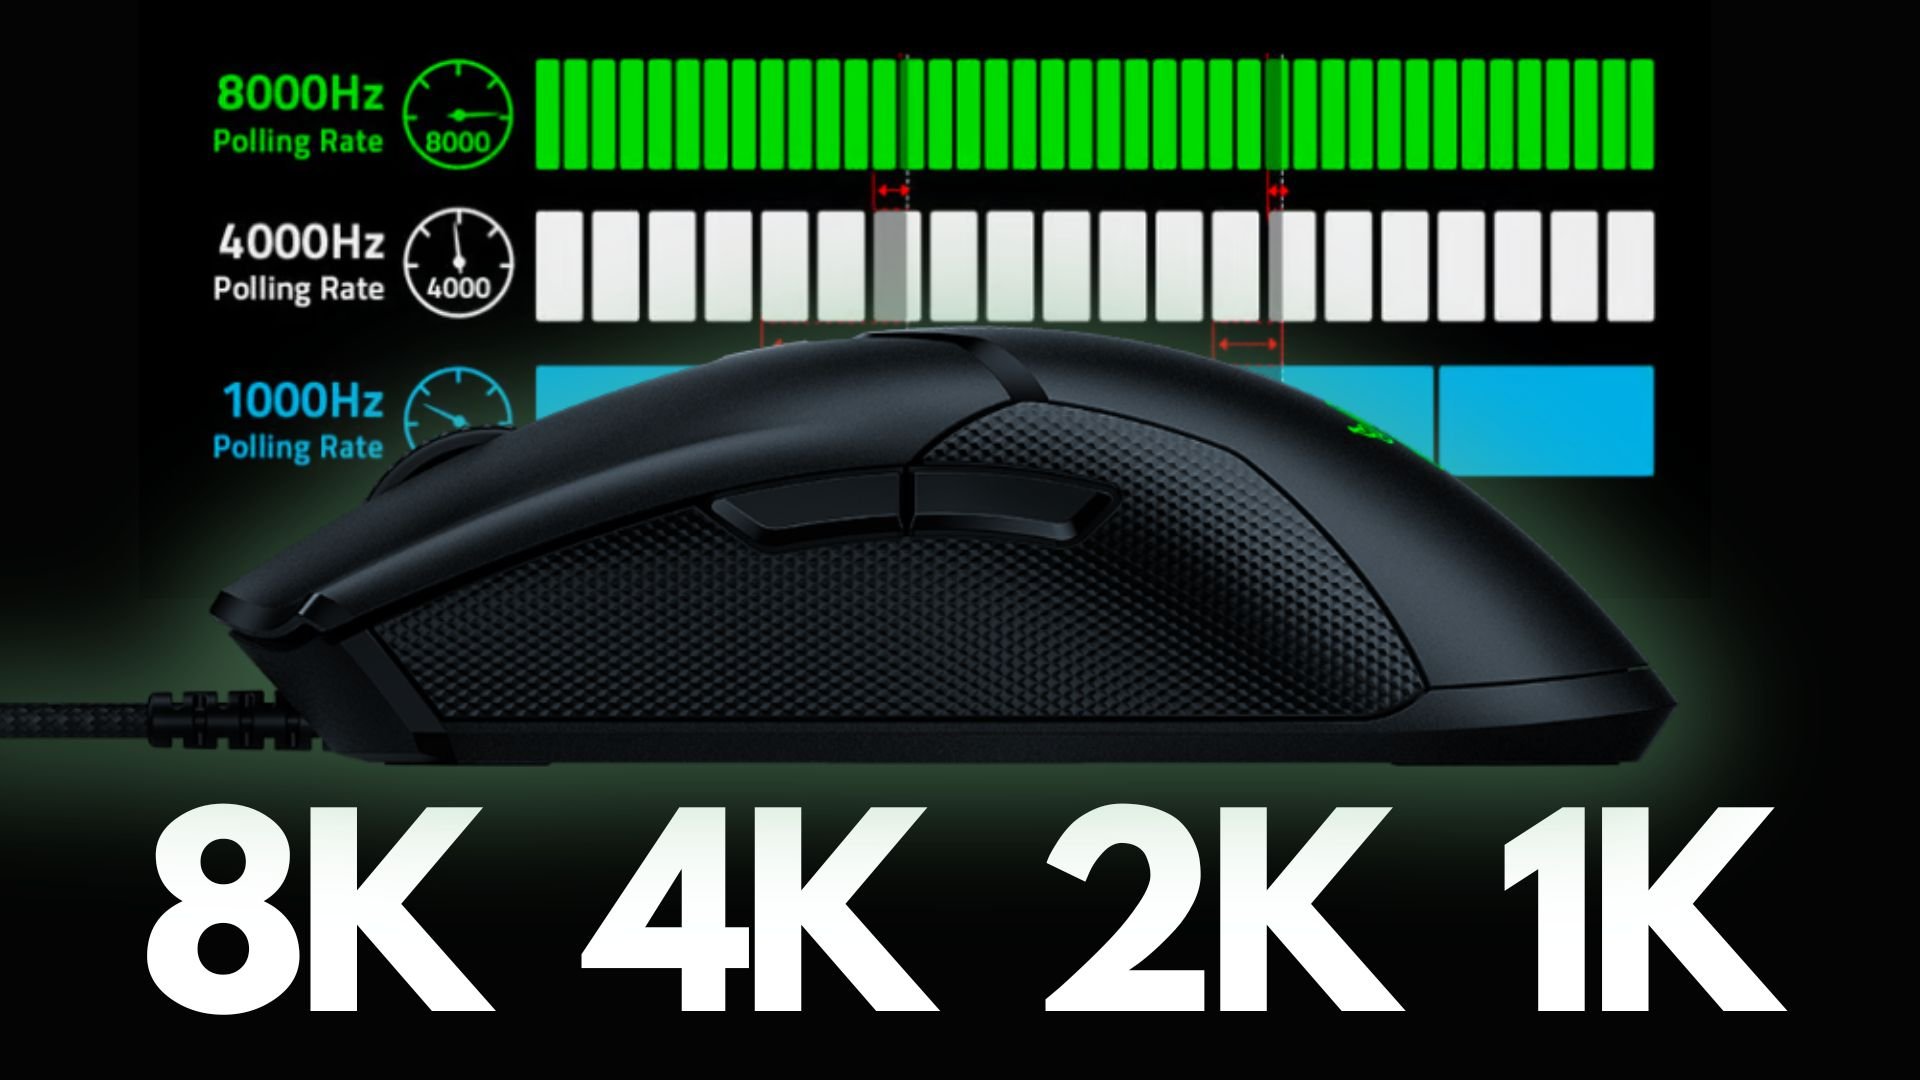
For instance, a mouse with its polling rate set to 125Hz will refresh its location on screen 125 times per second or every 8ms. The higher the polling rate, the more “real-time” the cursor movement that you see on the screen will be. Here’s a table of total millisecond delay at common polling rates.
| Polling Rate | Total Delay |
|---|---|
| 125 Hz | 8 ms |
| 250 Hz | 4 ms |
| 500 Hz | 2 ms |
| 1000 Hz | 1 ms |
| 4000 Hz | 0.25 ms |
| 8000 Hz | 0.125 |
What Is the Best Polling Rate for Gaming?
You should only really consider gaming mice with a polling rate of 1000 Hz at minimum. There are mice that have up to 4000 Hz polling rates, those are also good, but the benefits are greatly diminished after 1000 Hz. So 1000Hz is the best because it gives you a balance of performance, battery life and CPU load, anything more and you’re paying for a placebo effect.
Mouse Polling Rate Test
Want to know what your current polling rate is? We built a quick in-browser polling rate checker for your mouse.
Do Polling Rates Matter?
On paper, yes. The math checks out—and having a higher polling rate seems to be a no-brainer. But in reality, the difference between mice that polls at 500Hz and 1000Hz is only 1ms. So, unless you have superhuman eyes, you won’t notice any discernible difference between the two.
Some gaming mice such as the Razer Viper 8K and the Corsair Sabre Pro offer polling rates up to an insane 8000Hz! But is 8K worth it?
Gamers looking for the ultimate edge might find it worthwhile to shave off that 1ms and go 8000Hz, but for most gamers 1000Hz is plenty fast and the difference in 1ms doesn’t translate to better gameplay.
It’s been found that high polling rates of 1000Hz or more tend to put a heavier load on the CPU. in reality, this load is minuscule compared to what modern processors are built to handle, and should not affect most systems. But those who are still rocking older CPUs might face issues when using mice with super high polling rates. In their case, sticking to a simple middle ground would be much better.
Polling Rates in Wired vs Wireless Mice
Do wired and wireless mice differ in polling rate?” The short answer is: no.
The long answer is a little more complicated than that. You see, in the early years of wireless gaming mice, their polling rate was actually quite less compared to their wired counterparts and hence had much higher latency.
But wireless mouse technology has advanced to the point where there really is no difference in polling rate between them and wired mice. Any latency that can be hypothetically found in a wireless gaming mouse will have to do with Bluetooth interferences and not polling rate.
So, you really don’t have to worry about being disadvantaged when it comes to latency and polling rate if you do go for a wireless mouse. Higher polling rates on wireless mice draw more power, so if you’re trying to converse battery life on your wireless mouse, going 500Hz instead of 1000Hz will save you some juice.
How to Change the Mouse Polling Rate
There are many different methods to change the polling rate of your gaming mouse—and it all depends on the brand. Some mice allow you to change the polling rate from physical buttons that are present on the mouse itself. Others require proprietary software to do so. We have listed below the steps needed to change the polling rate of the most common brands of gaming mice.
1. Logitech Mice
If you have a Logitech mouse, you will need to install the Logitech G Hub application or the Logitech Gaming Software. You can find the polling rate options under the “Sensitivity (DPI)” section in G Hub, and under the gear-shaped icon in Logitech Gaming Software. The polling rate is called the “report rate” in both applications.
2. Razer Mice
If your mouse is made by the infamous three-headed snake, you will need Razer’s proprietary software as well. Install the Razer Synapse software if you haven’t already. Once you have it installed, open the application and click on your mouse. Then, click on the “Performance” tab and move down to the polling rate section.
Here, there are two methods by which you can adjust your mouse’s polling rate. The first option is to select a specific polling rate from the given presets. These are usually set at 125Hz, 500Hz, and 1000Hz. Alternatively, you can click on the drop-down menu and manually select your preferred mouse polling rate.
3. Glorious Mice
If you own a Glorious gaming mouse and wish to change its polling rate, you will need to install the Glorious software in order to do so. The software is chock full of options that allow you to customize your mouse in whichever way you want. But the setting we’re looking for can be found on the “Mouse Parameter” menu on the bottom right corner. Clicking this will open a list of sub-menus. You will find the polling rate menu towards the bottom. Click it and you will be able to set whichever polling rate you wish.
4. SteelSeries Mice
Just like the previous brands, SteelSeries mice also require you to install customization software. In this instance, it’s the “SteelSeries Engine”. It’s a comprehensive software that allows you to tweak many settings, including polling rate. Simply select the polling rate you want and apply the settings.
5. Zowie Mice
BenQ Zowie mice are quite different in how their polling rates are adjusted. You can actually use physical buttons on the mouse to change its polling rate by doing a series of simple maneuvers. Although the question of whether or not this method is better than using a simple software control is up for debate.
First, make sure your mouse is unplugged. To change your polling rate to 125Hz, hold mouse buttons 4 and 5 (these are the side buttons) and plug the mouse into the USB port. The mouse wheel will light up to confirm the polling rate change.
To set the polling rate to 500Hz, hold mouse button 5 and plug the mouse back in. the wheel will again light up to confirm the change. And finally, to set the mouse’s polling rate to 1000Hz, hold down button 4 and plug in the mouse. The wheel will light up (again).


