The Steam Deck is a handheld powerhouse, almost with the power of a PS4 in your hands. The Steam Deck can play AAA games at steady frame rates already, but there’s free a way to get even more power out of it.
Increasing UMA frame buffer size on your Steam Deck can improve minimum frame times and average frames to get an overall smoother gameplay experience. It’s easy to do, there are no trade offs and you can easily change it back if needed.
What is UMA frame buffer size?
The Steam Deck uses a system on a chip with an integrated GPU. This means the CPU and GPU share from an overall RAM pool.
By default the Steam Deck allocates a minimum 1 GB buffer of RAM for the GPU to access at all times, sometimes the Deck will allocate more ram as needed dynamically if the game calls for it.
Setting the buffer to 4GB makes sure any game you play on the Steam Deck has a minimum of 4GB ready to go.
Having the extra RAM available makes the overall frame rate of your games smoother in case the VRAM scaling happens a slowly on its own.
Should I increase UMA frame buffer size?
Yes, for the most part, increasing the buffer size has very few drawbacks and a lot of upside. The Steam Deck has 16 GB overall, so the CPU will not be starved for RAM generally.
If a game is particularly CPU heavy, this change might cause some performance issues, but most games are GPU limited so this change is better for most gamers.
If you want to game at higher resolutions, the frame buffer increase will make performance there even more noticeable in docked situations.
How to increase UMA frame buffer size in Steam Deck
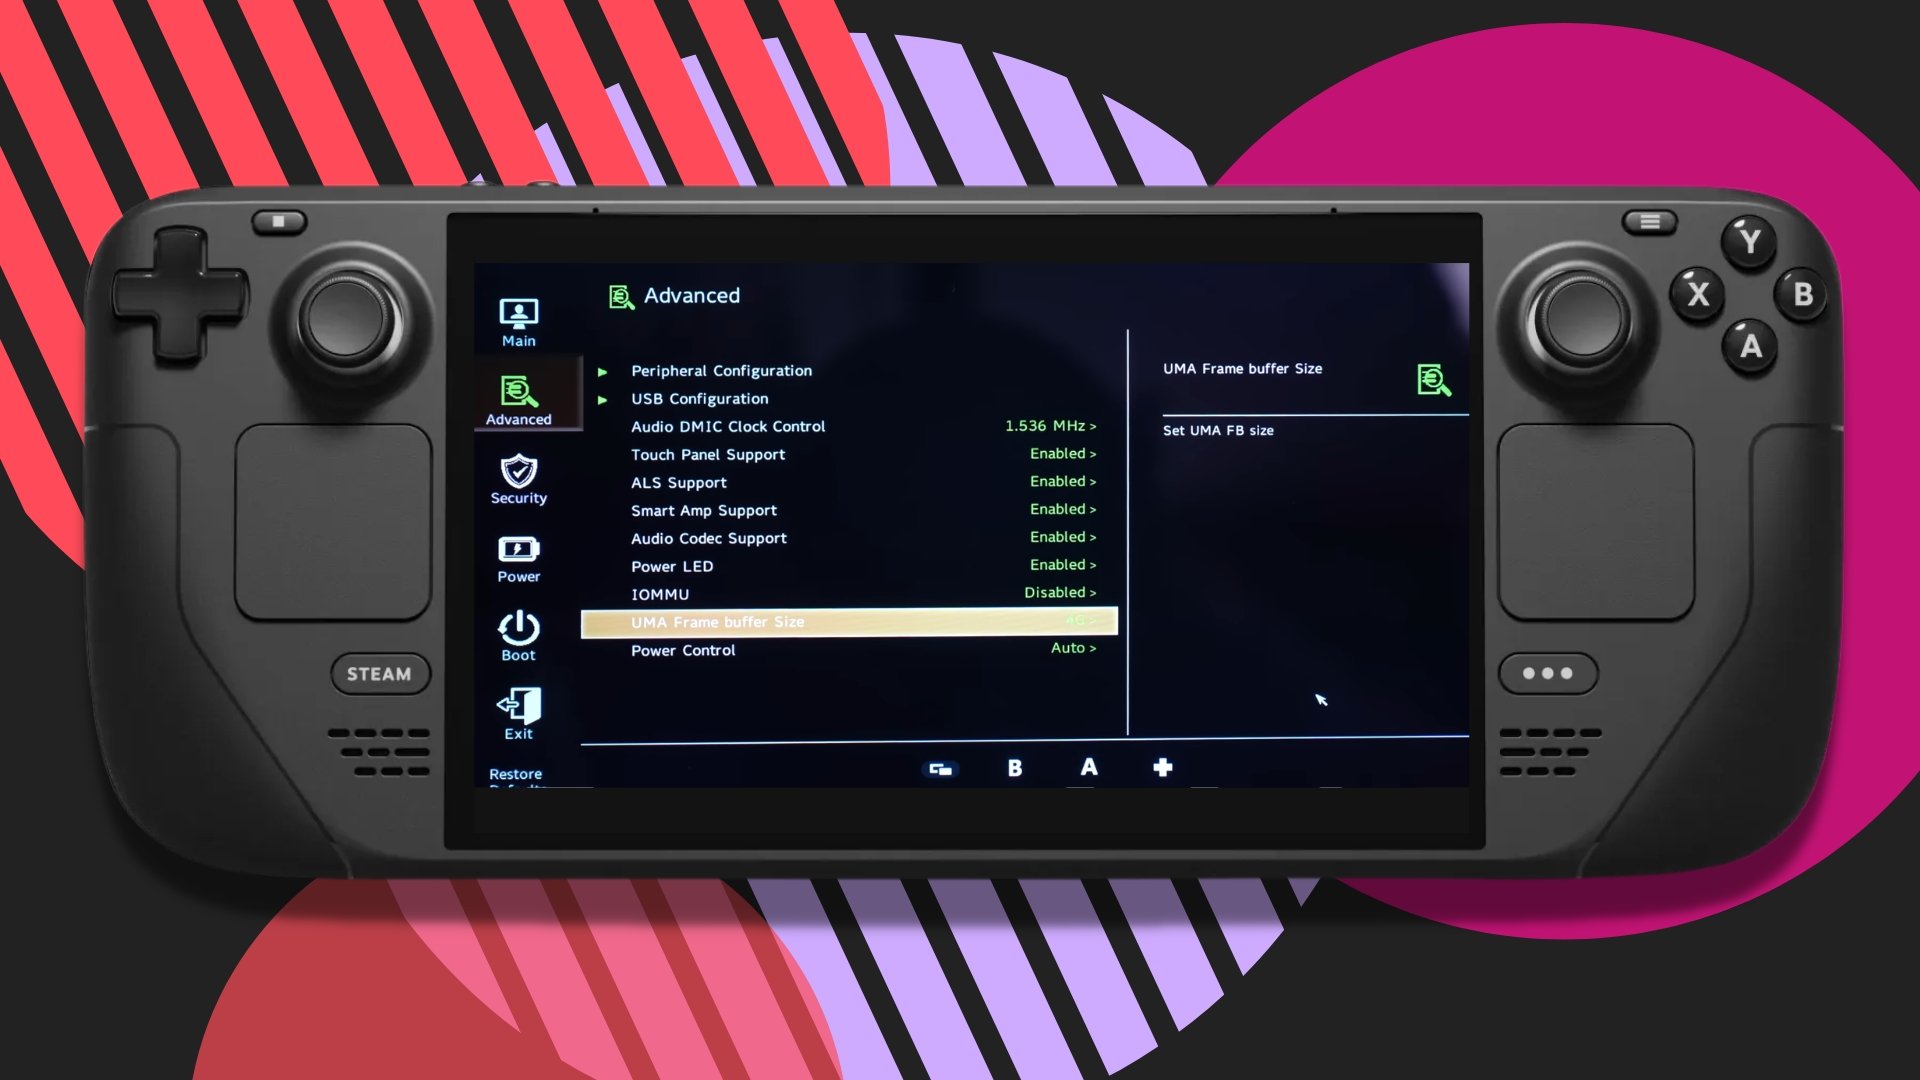
You need to boot into the Steam Deck BIOS to access the UMA frame buffer setting:
- Power off your Steam Deck
- Press and hold the power button and plus (+) button down until you hear the beep
- Select Setup Utility from the menu
- Navigate to advanced
- Find UMA Frame buffer size
- Hit A to select, choose the 4G option
- Press the screenshot button to Save and Exit.
Voila! Your games now have access to 4GB of VRAM by default without needing to scale.


