Your keyboard is a notorious catcher of hair, cheetos, skin, nails and dust. So sometimes you need to open up that bad boy to give it a good cleaning.
Here’s everything you need to know about removing keyboard keys.
What you need to remove a keyboard key
You can use a variety of tools to pop off keyboard keys. There are some products made specifically for removing keycaps, called keycap pullers. There are two types, plastic and wire. I’d recommend the wire version because it has less chance of scratching your caps. A lot of keyboards now come with a puller included.
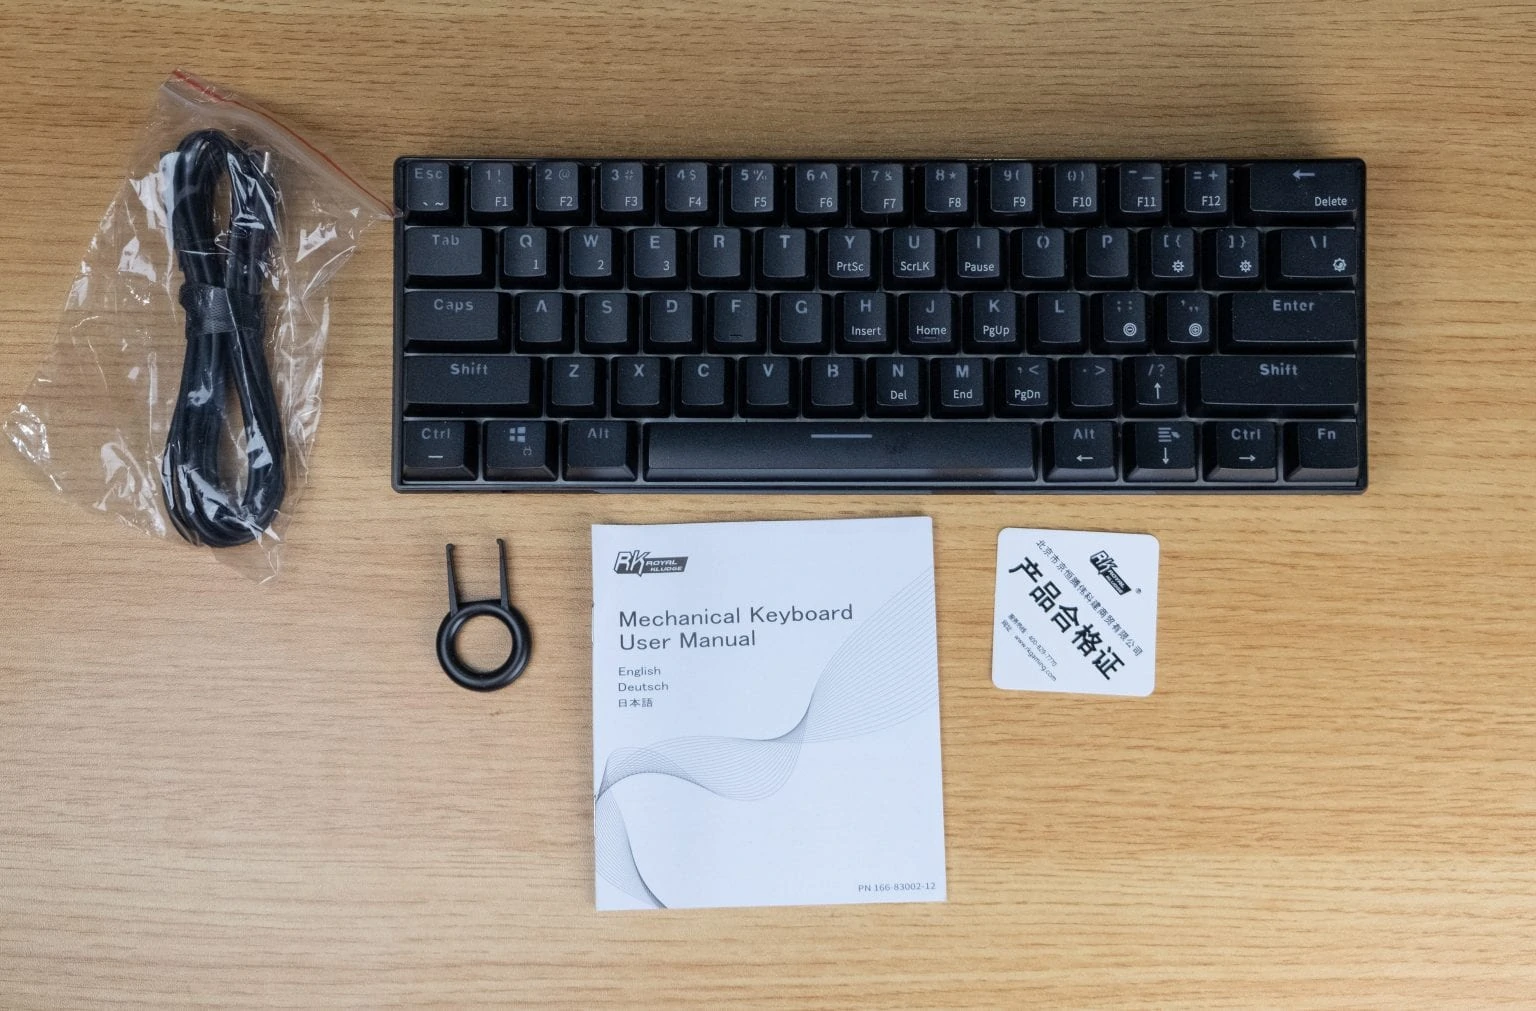
You don’t need a specialized tool to remove keys though, anything that can slip between the gaps of the keyboard will do for prying up a keycap. Keys, a paperclip, a thin ruler or a flathead screwdriver can all work, just be more careful not to scratch or bump into anything. When you create enough space, you can use your fingers to lift up caps.
How to remove a keyboard keys
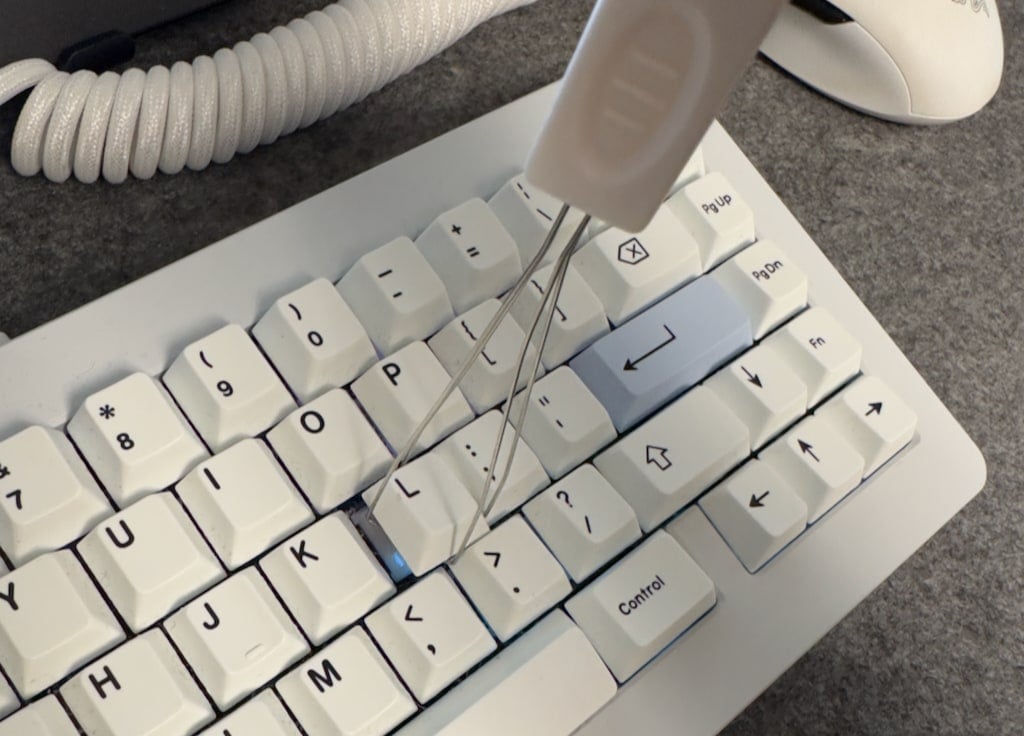
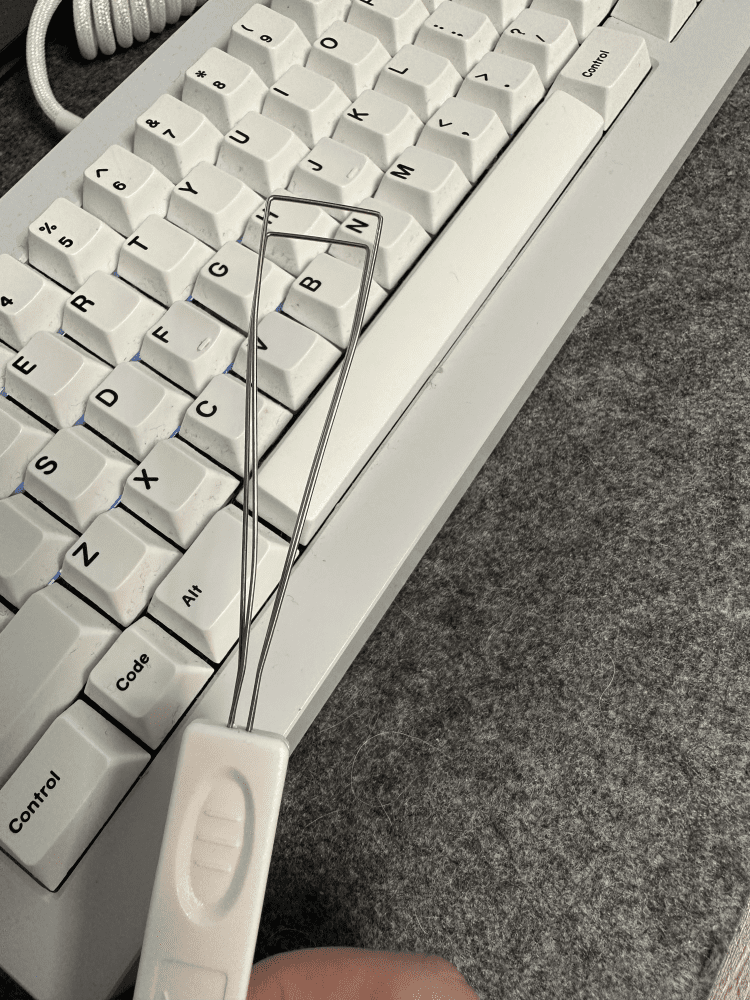
Removing keyboard keys is easy, use your tool, could be a fingernail, pen, screwdriver or keycap puller and wedge it underneath your first key and gently pry up vertically to release the keycap from the stem. Longer keys might only come out one side a time.
Remove the first key

If you’re using a wire keycap puller, make sure the puller gets underneath the keycap. A plastic keycap puller has a tighter fit, so make sure the teeth of the plastic puller get to the bottom side of the cap.
If you’re using a general tool, fit the tool underneath the keycap.
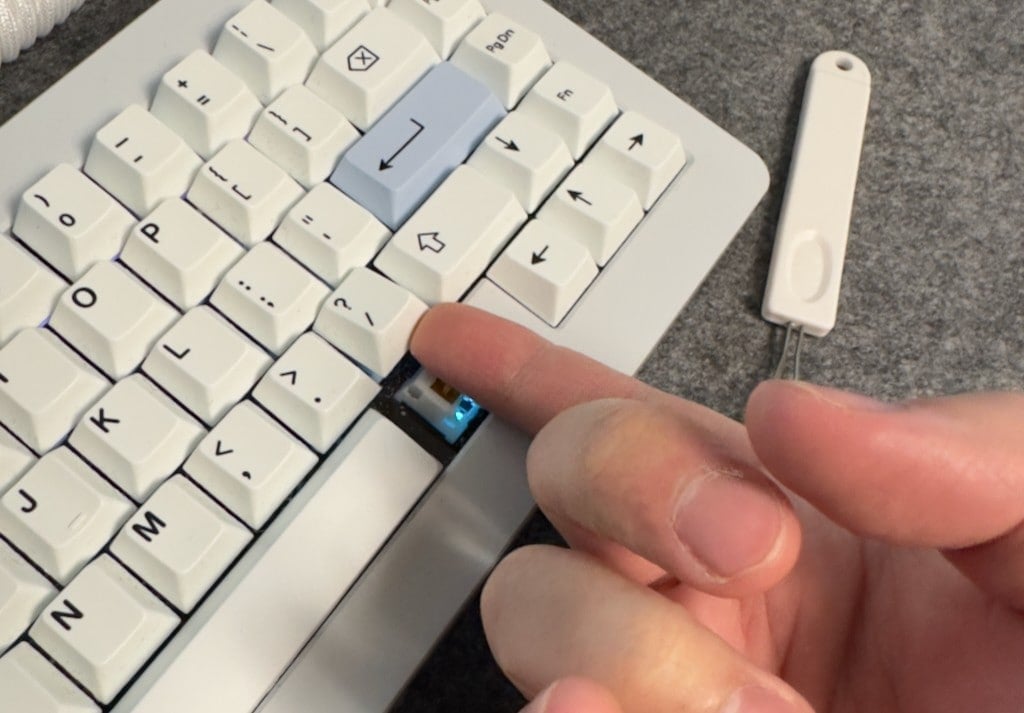
Pull up with gentle pressure
Key caps are tension fit onto the switch stem. You need to use a little bit of upward pressure to get the keycap off.
If you’re using a paperclip, screwdriver or other tool, gently pry as vertical up as you can.
Careful around bigger keys
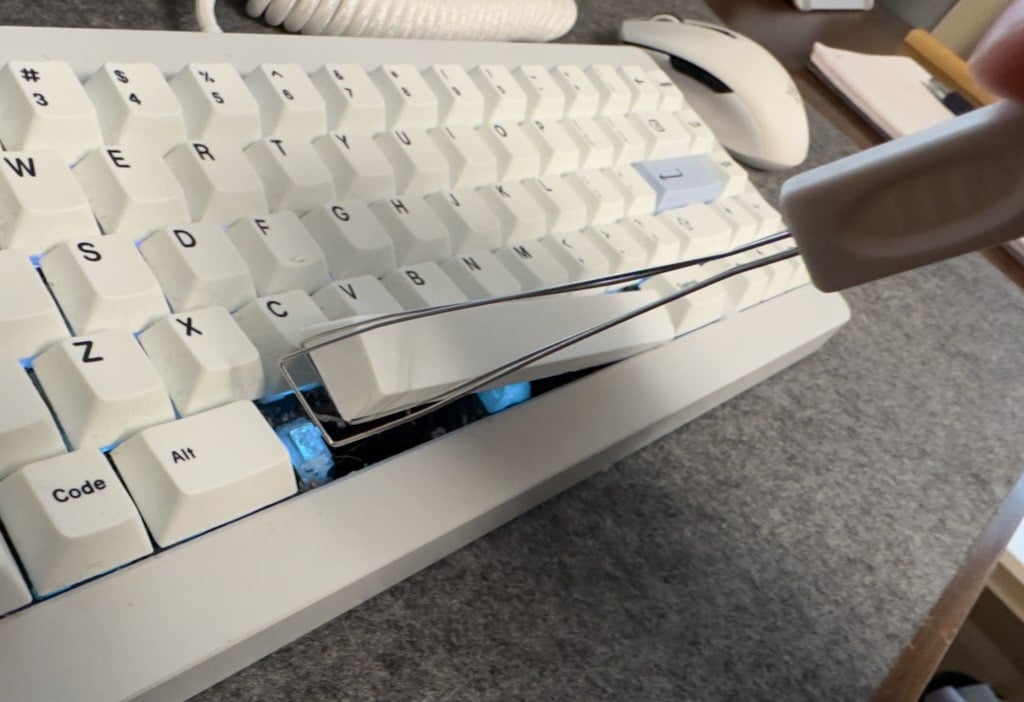
Larger keys like the spacebar and shift keys are stabilized with supporting stems. They require a little bit more finesse to take off. It’s usually better to take off one side of the longer keys then go to the other side.
Do your thing after keycaps are off
Once your keycaps are off you’ll have full access to the keyboard switches and plate or PCB.
Clean your keyboard
With the key caps out of the way, you can now blow out all the debris in your keyboard. Compressed air or a simple upside shake will loosen a lot of junk out of your keyboard. You can use q-tip swab with alcohol if there are any more stuck on things you need to remove.
Clean your keycaps
Key caps can get dusty and grimey just like your keyboard. Take your loose key caps and wipe them down with a microfibre cloth and alcohol. Mine are quite dirty in these photos.
Switch keycaps
If you are customizing your mechanical keyboard with hot new aftermarket GMK keycaps, this is the time to install them.
Change your key switches
If you have a hotswappable mechanical keyboard, you can use your switch puller to easily replace your switches now.
How to re-apply keycaps
Reinstalling your keycaps is an easy process, line up the stem of your keyboard switch with the keycap and press down firmly. Long keys like the spacebar might require attaching the stabilizing wire into your keycap.
Conclusion
Easy right? Now that you know how to remove your keyboard keys, make sure to remove them and clean your keyboard often. Don’t let it get grimy, like in my photos.