The art of caretaking mechanical keyboard switches is an intricate one. It can seem like quite a daunting task for someone who’s looking into servicing their own switches. The truth is that lubing mech switches is quite an easy—not to mention therapeutic—job! Once I give you the right pointers, you’ll be taking apart and lubricating your switches like a pro in no time.
Types of Keyboard Lube
Almost every type of lubricant in existence can be divided into two main groups: Oils and Greases. Regardless of which group they belong to; all lubricants differ in their relative viscosity.
What is viscosity you ask? Think of it as a liquid’s resistance to being poured. Honey is something that cannot be poured easily, this makes it have a high viscosity. Meanwhile, water can easily be poured— making its viscosity low.
The common practice is that you’re supposed to use low viscosity lube on tactile and clicky switches like Blues, Browns, and Pandas. Linear switches like Reds and Blacks prefer higher viscosity lube. Components like stabilizers need a thick and heavy grease-based lube in order for them to function optimally.
If you start shopping for lubricants, you’ll notice a lot of numbers thrown around such as 3203 or 205g0. These may sound very arbitrary for a beginner, but these numbers are actually the grades given to them that determine their relative viscosity. Krytox is a popular family of lubricants where their viscosity is graded with a number. The lower the number, the less viscous it is. The lubricants with the 10x grading are oil-based while those with the 20x grading are grease-based. One of the most commonly used lubes is the Krytox 205g0. The g0 stands for grade zero, which is a measure of consistency. Grade zero consistency is considered very smooth and optimal for lubing key switches. Higher grades of consistency will start to feel thick and buttery.
Water-based lubricants also exist, but when it comes to lubing key switches, I’d suggest you stay away from them. These types of lube are way too thin, which means they will evaporate quickly and you will need to re-lube pretty often. What’s more, water-based lube can cause conductivity issues if it accidentally leaks onto the PCB, which can get real ugly.
Oil vs Grease
So, the question it all comes down to is: which type of lube should you go with? To put it plainly, neither one is objectively better than the other when it comes to raw performance. What they do differ in is in the ease of application.
Oil-based lubricants are generally easier to apply as they’re less viscous (or less thick, to put it differently) compared to grease-based lube. This means that you can easily lube your springs by putting them in a plastic bag with some oil and shaking it around. The versatility that comes with oil-based lubricants is why many like to work with them over their greasy counterparts. Besides, lubing springs can be a painstaking process, so any way to make the process more efficient is always welcome.
Grease, on the other hand, is quite easy to apply using a brush, and only with a brush. This makes them easy to use on every part of the switch except the springs.
When it comes down to it, don’t worry too much about the type of lube you need to get. Most enthusiasts go by personal preference, and some even use a mix of oil for springs and grease for the rest of the switch.
Keyboard Lube Recommendations
As I mentioned earlier, which lube you go with ultimately depends on the type of switches you are lubricating. It’s important to remember that viscosity plays a big part in the lube you pick, with slightly thinner lube being most commonly used on switches.
Unlike switches and keycaps, keyboard lube is much easier to find. switchmod.net and mykeyboard.eu are good places to look as they almost always have the most commonly used lubricants in stock.
- For tactile switches: tactile switches need a lube that is less viscous. Tribosys 3203 or Krytox 203 are the most optimal. You can easily find these in stock and not have to worry about getting enough.
- For linear switches: the best lube for linear switches that bottom out at or over 60g is undoubtedly the famous Krytox 205g0. This is of the perfect consistency and viscosity for your linear switches, and your linears will be thanking you for lubing them up with 205g0.
- For clicky switches: clicky switches are a bit tricky since the whole purpose of them is to sound as loud as possible, and well, lube does exactly the opposite to them. You can lube your clicky switches while maintaining their distinct sound and feel as long as you are very, very careful as to which areas of the switch you apply lube to. Krytox 105 is a nice low viscosity lube that will work perfectly with clicky switches (again, as long as you know what you’re doing).
Tools Required to Lube
Before getting started, make sure you’ve got everything you need to lube your switches and put them back into the keyboard. Lubing is a long process and you really can’t speedrun it. So make sure you’ve got everything prior to getting into it.
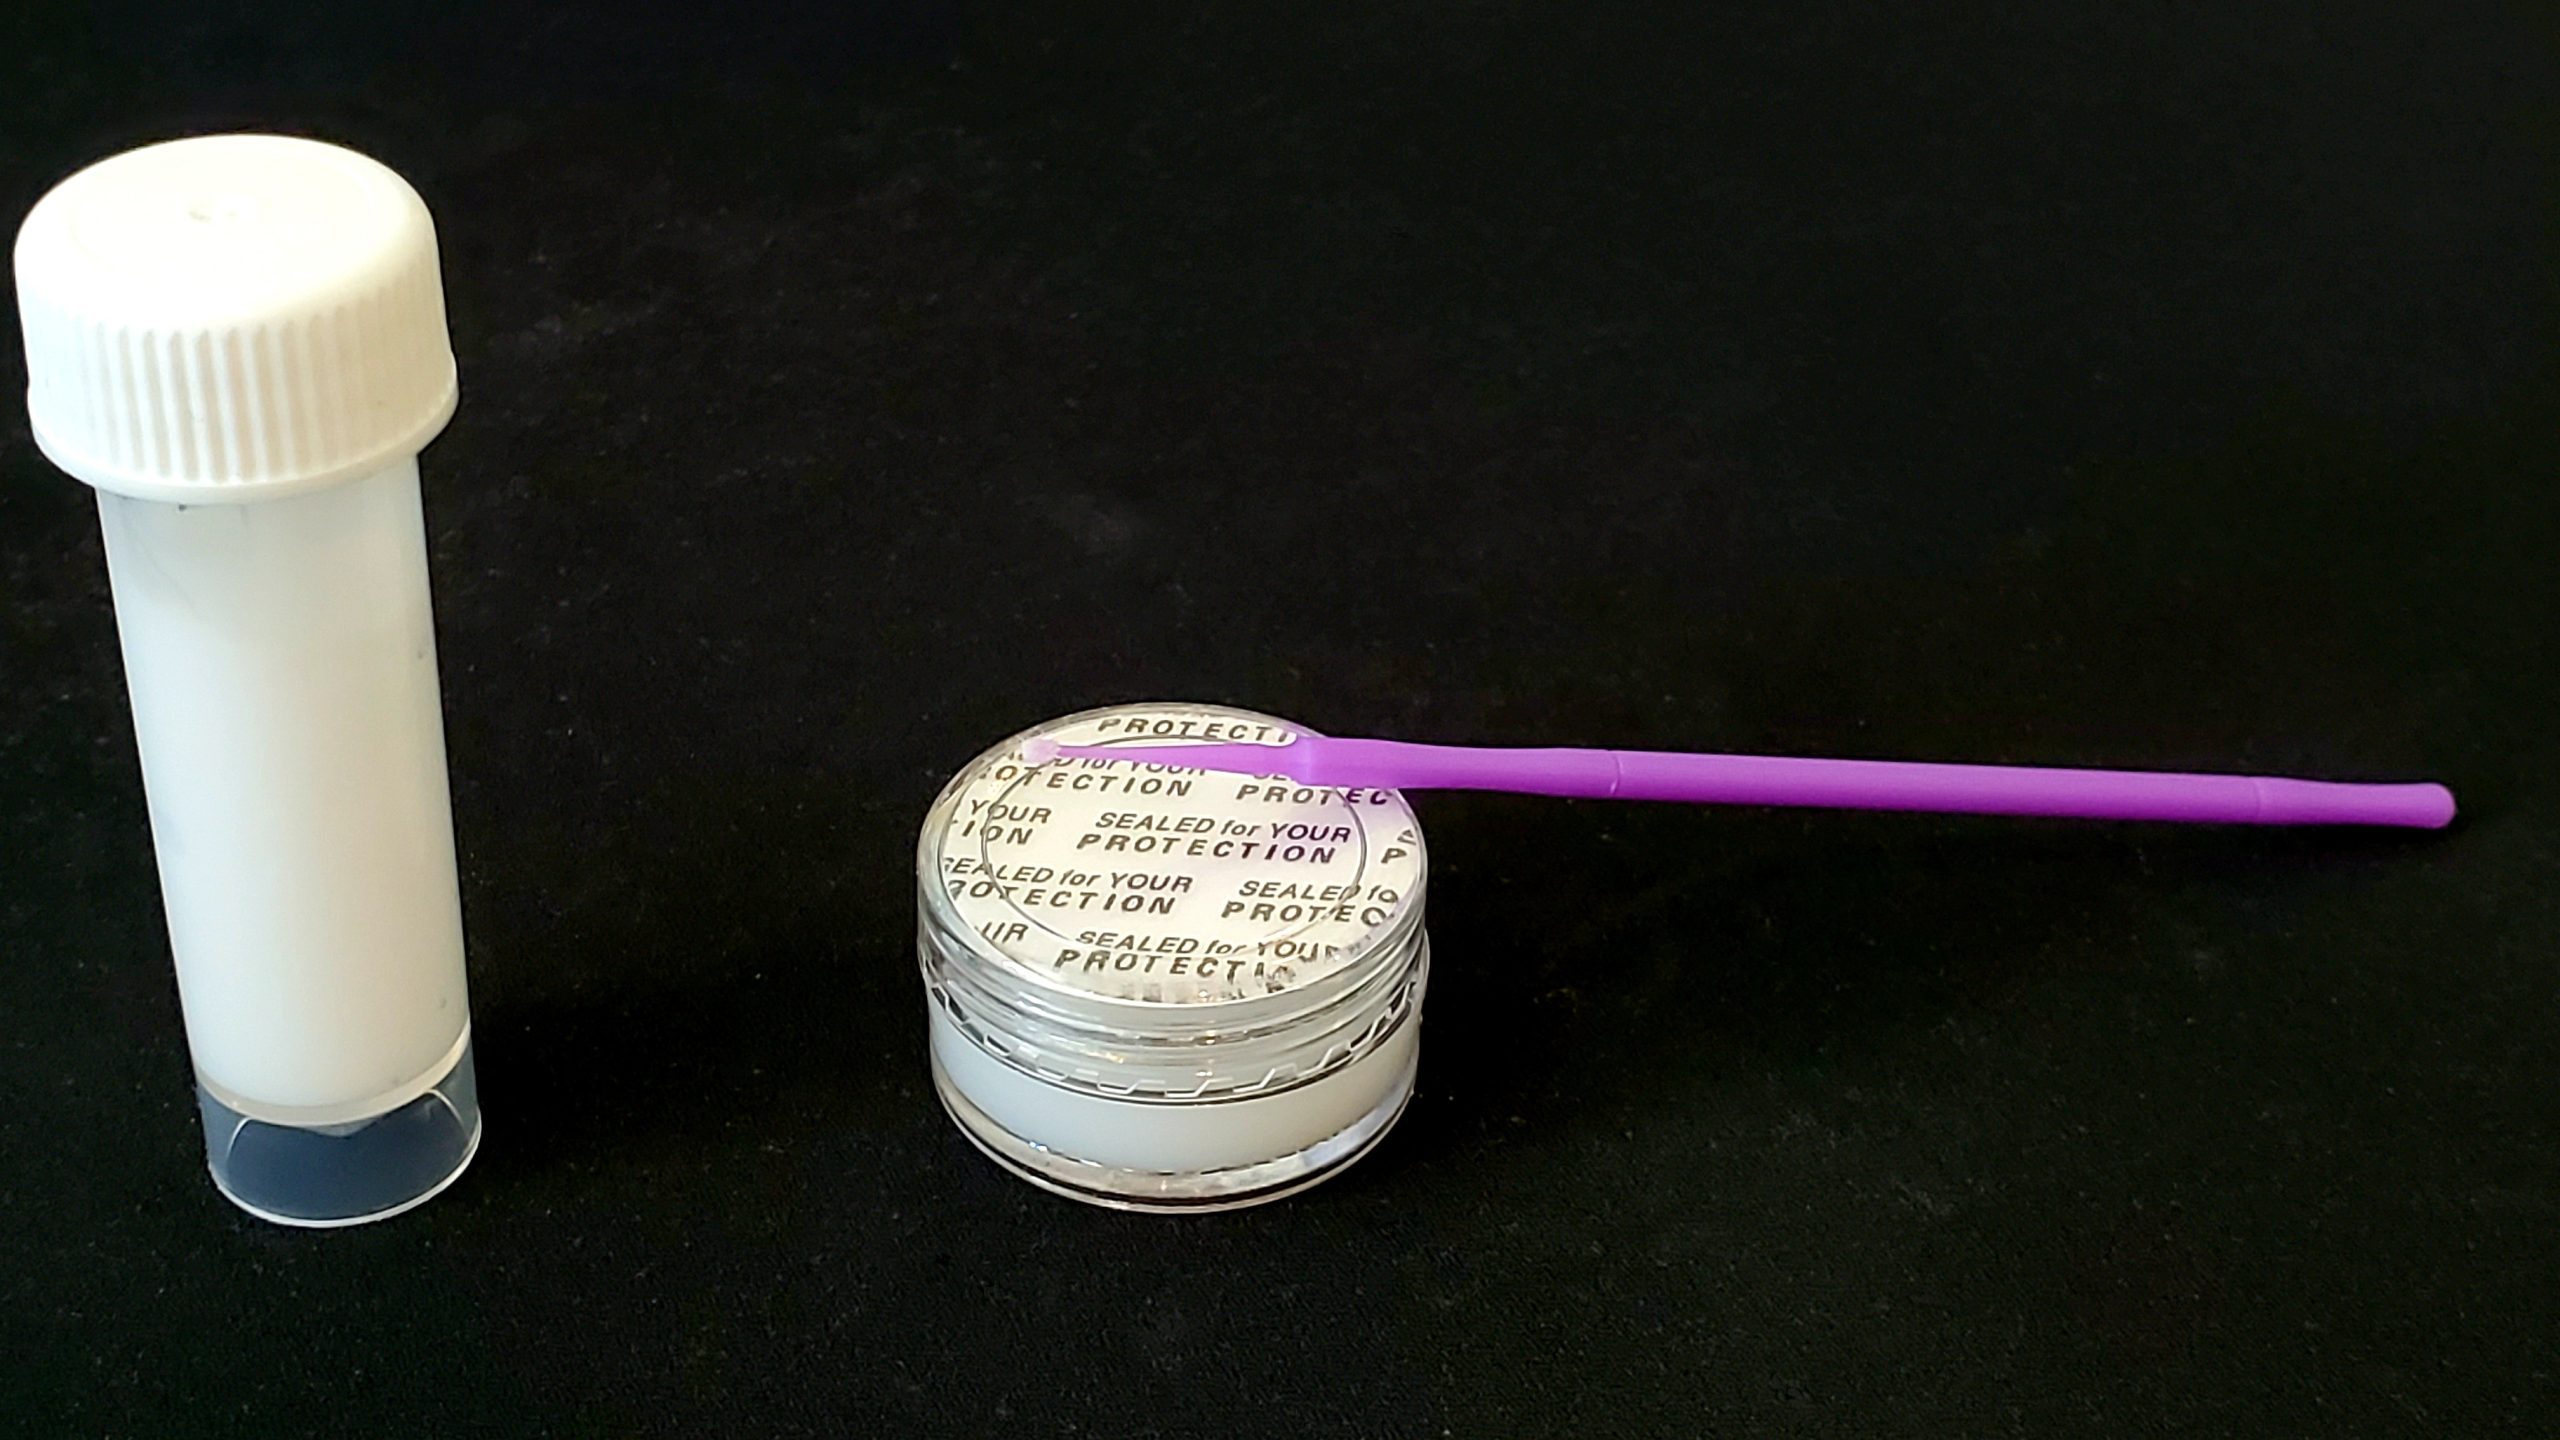
- Lube: This is a no-brainer, but make sure you have your lubricants near your workspace so that you don’t have to scurry around looking for them.
- Switch puller or soldering iron: if your keyboard is hot-swappable, it’s generally much easier to remove the switches from the PCB. Just take a switch puller (you usually get one with your keyboard or switches) and pry them out of the keyboard. However, if your switches are soldered onto the PCB, then a switch puller will be of no help and you will need to break out the soldering iron to de-solder the switches out of the PCB. Make sure you have soldering wire in hand for when you need to re-solder the switches back once you’re done lubing them.
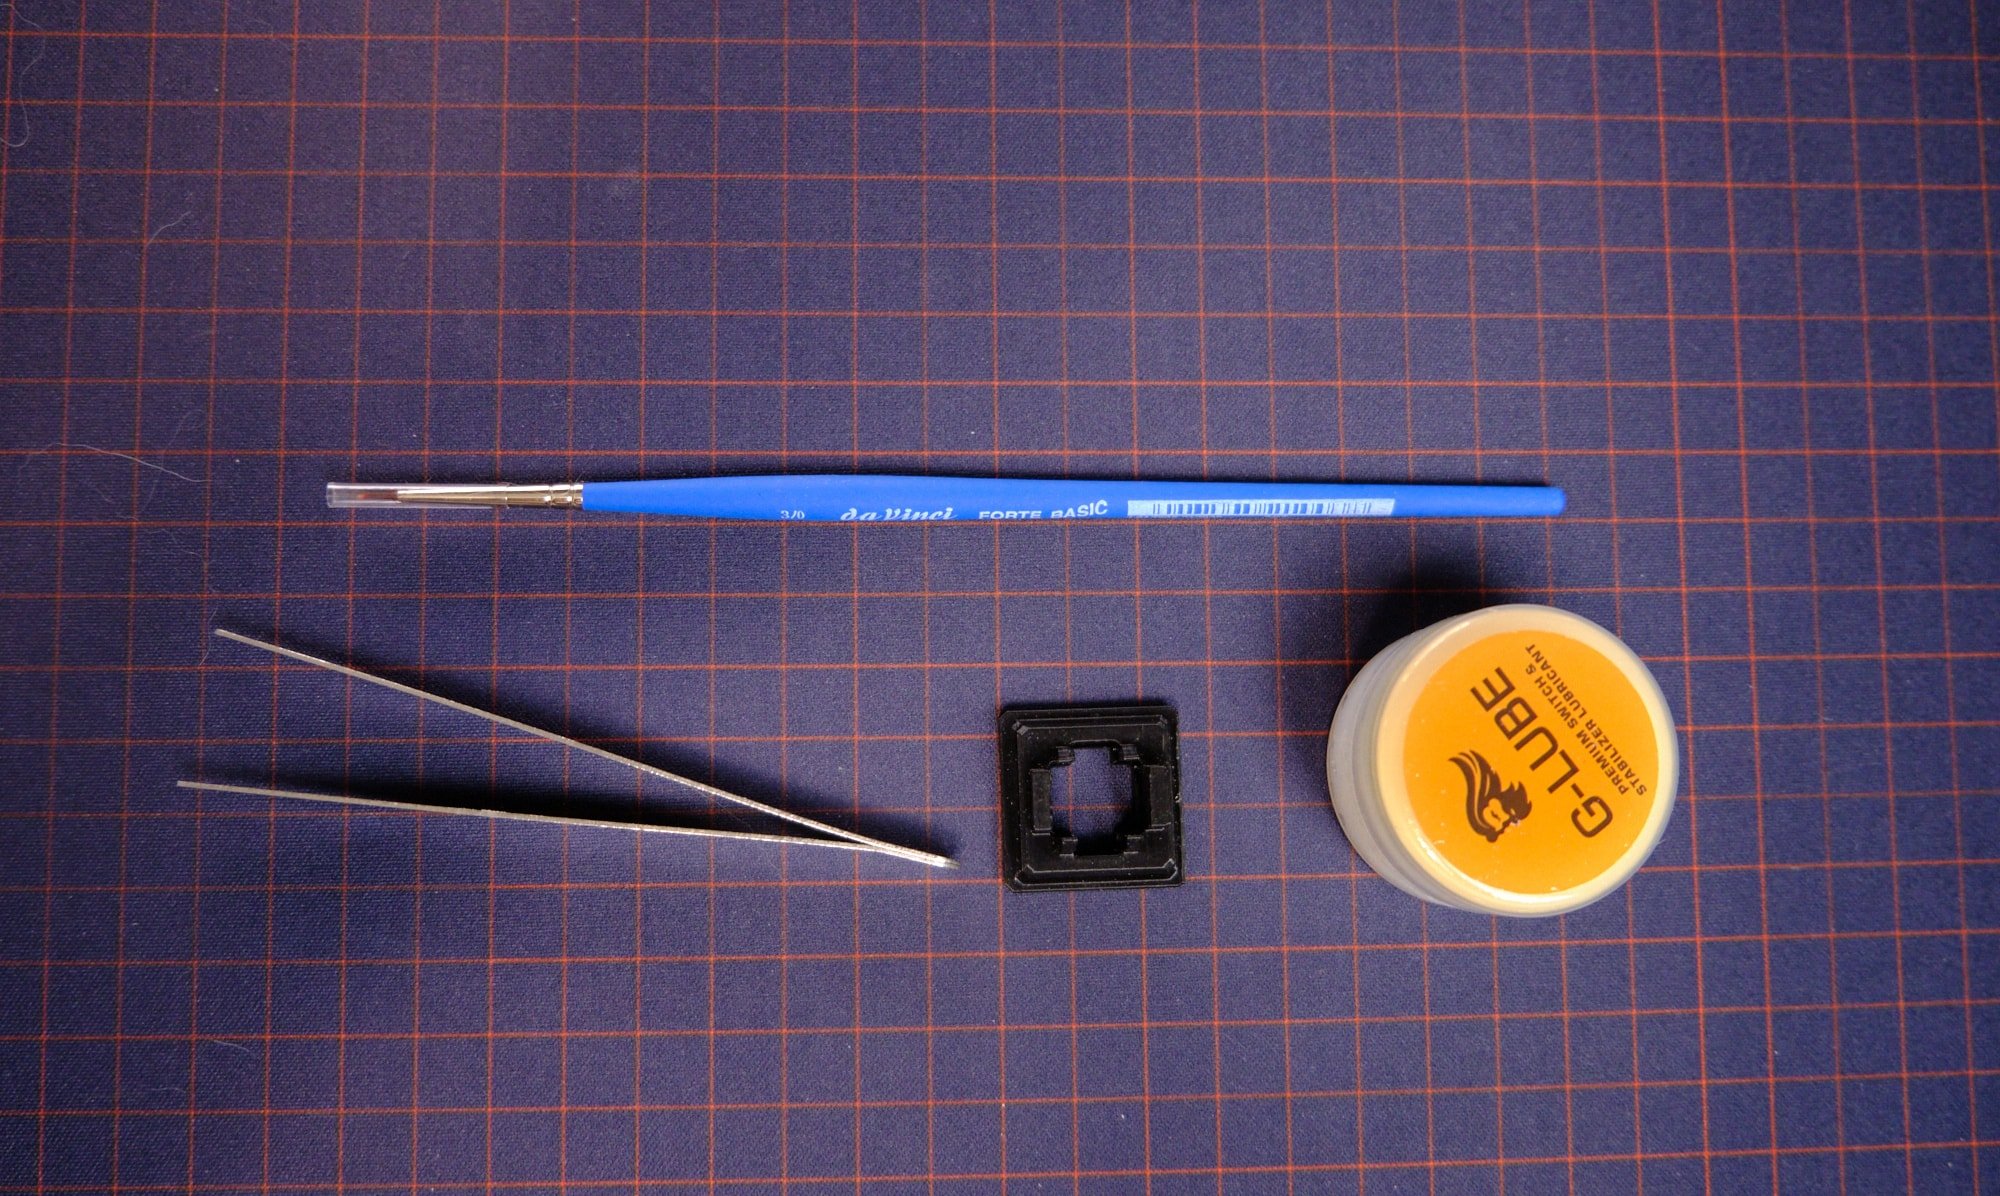
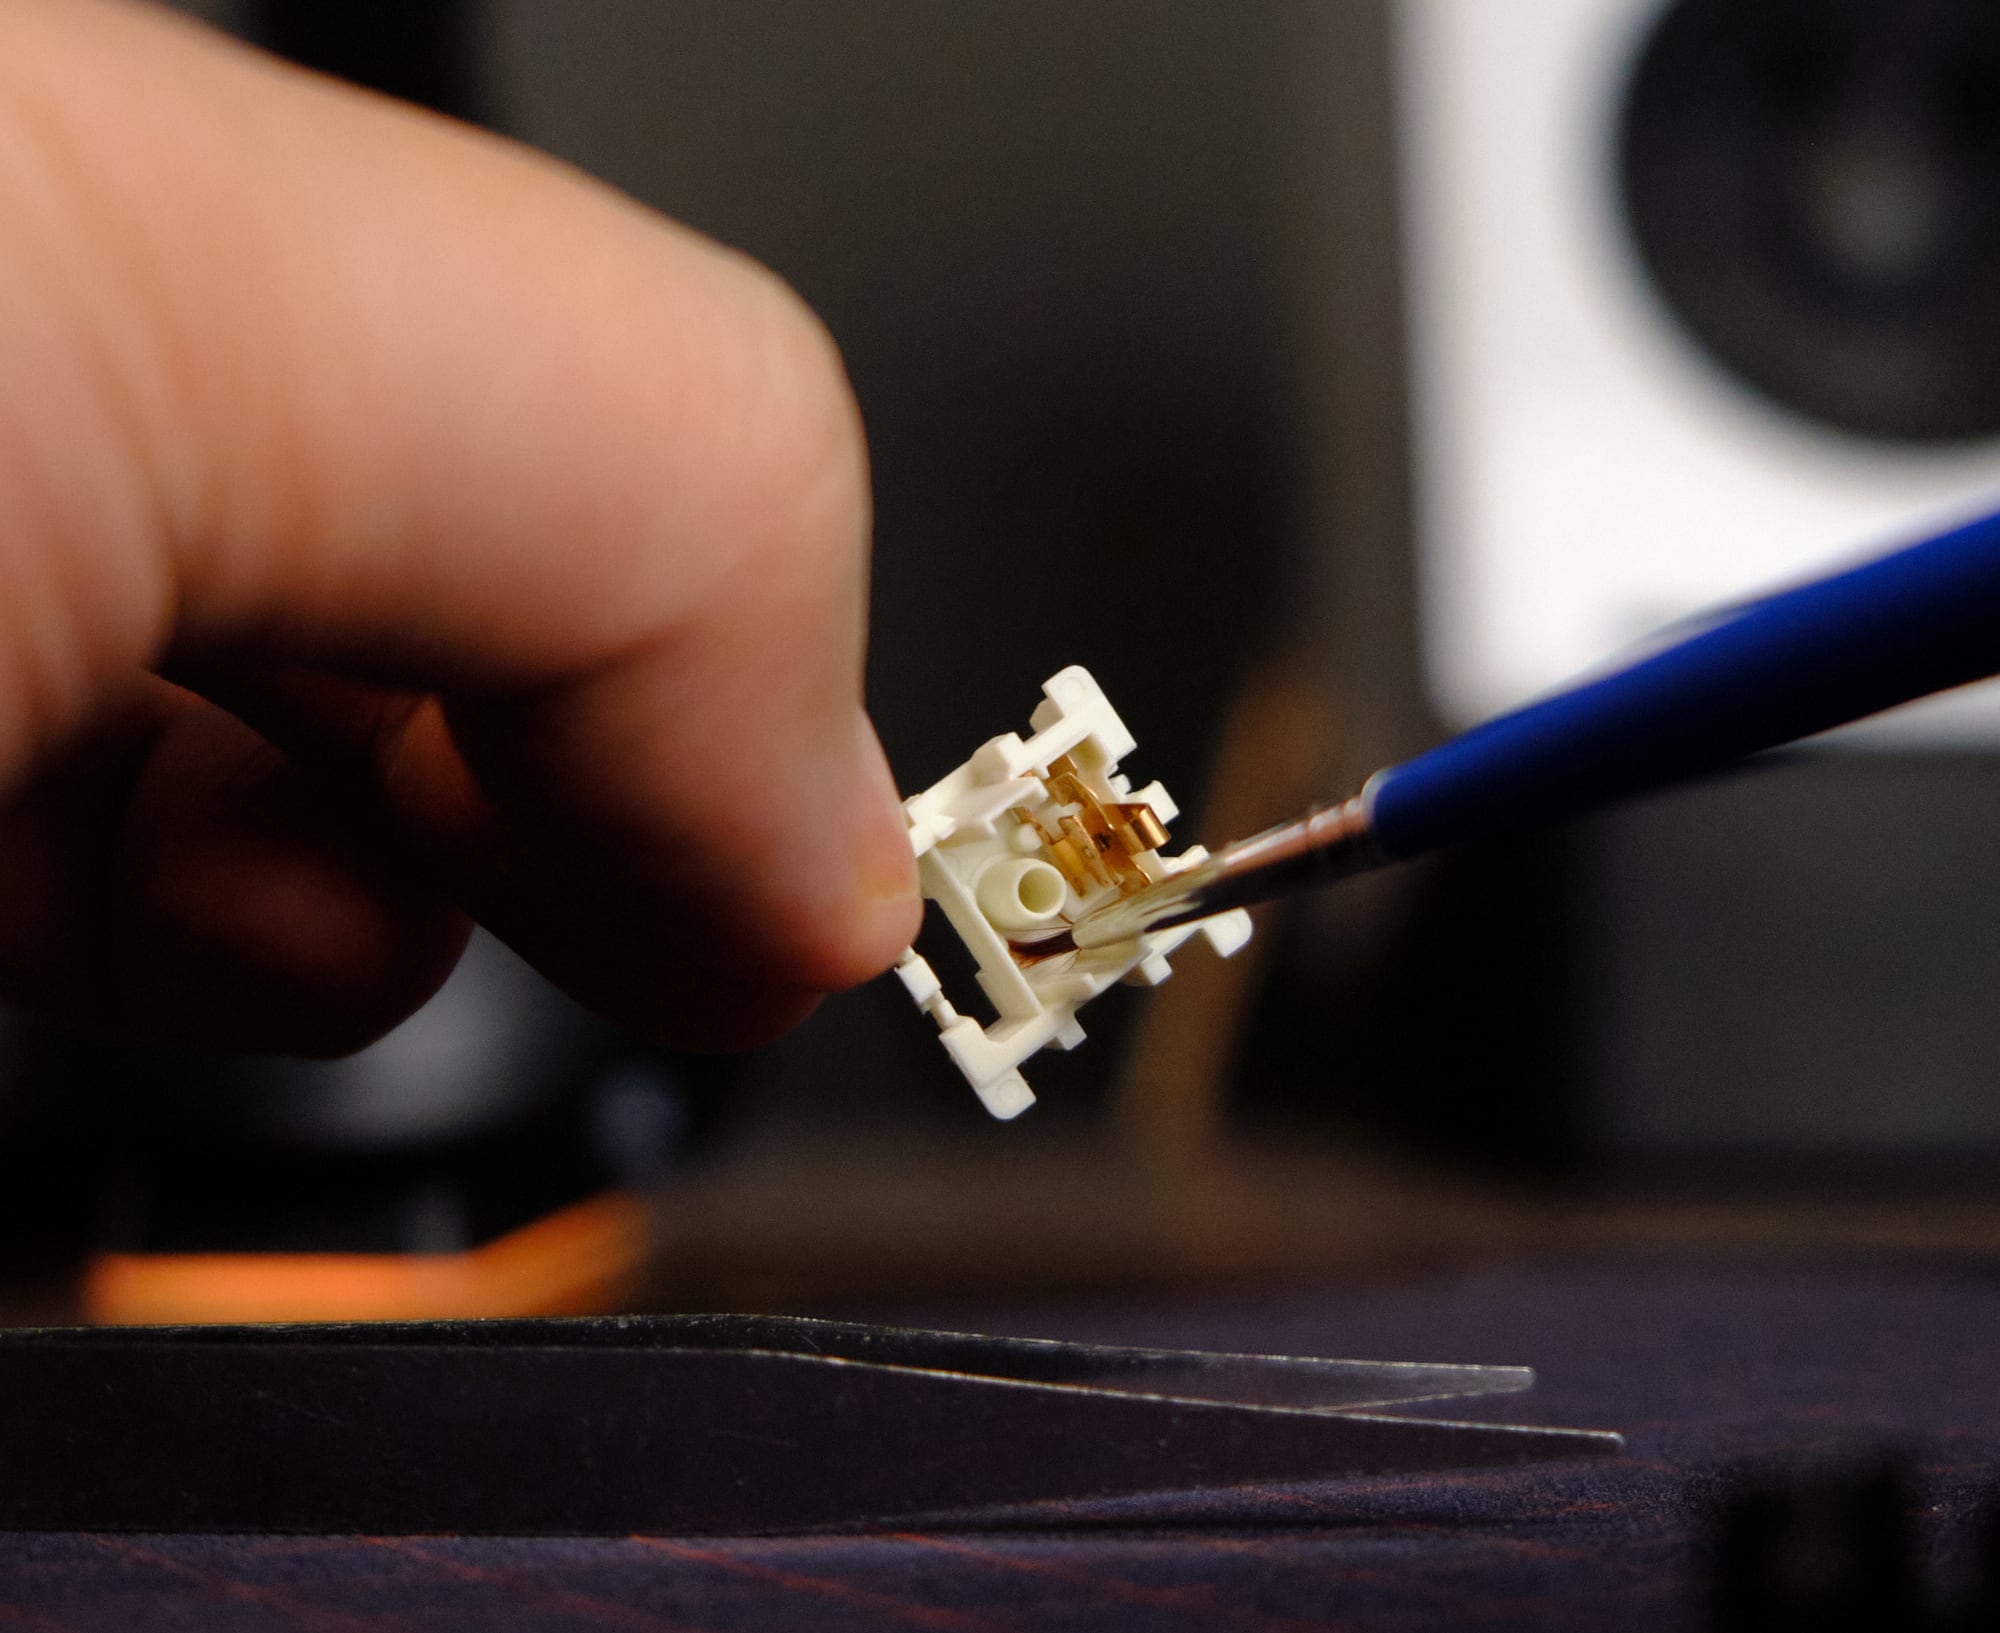
- Paintbrush: you’ll need one to apply the lubricant onto the insides of the switch (and on the springs if you’re using grease). I recommend getting a size #2 brush since it’s perfectly sized for getting into all the nooks and crannies inside the key switches.
- Switch Opener: once you have removed the switches, you’ll need to open them up. This can be done easily using a switch opener. But if you don’t have one at hand, a flathead screwdriver will do the trick. Just be gentle and make sure you don’t snap off the plastics on the switch.
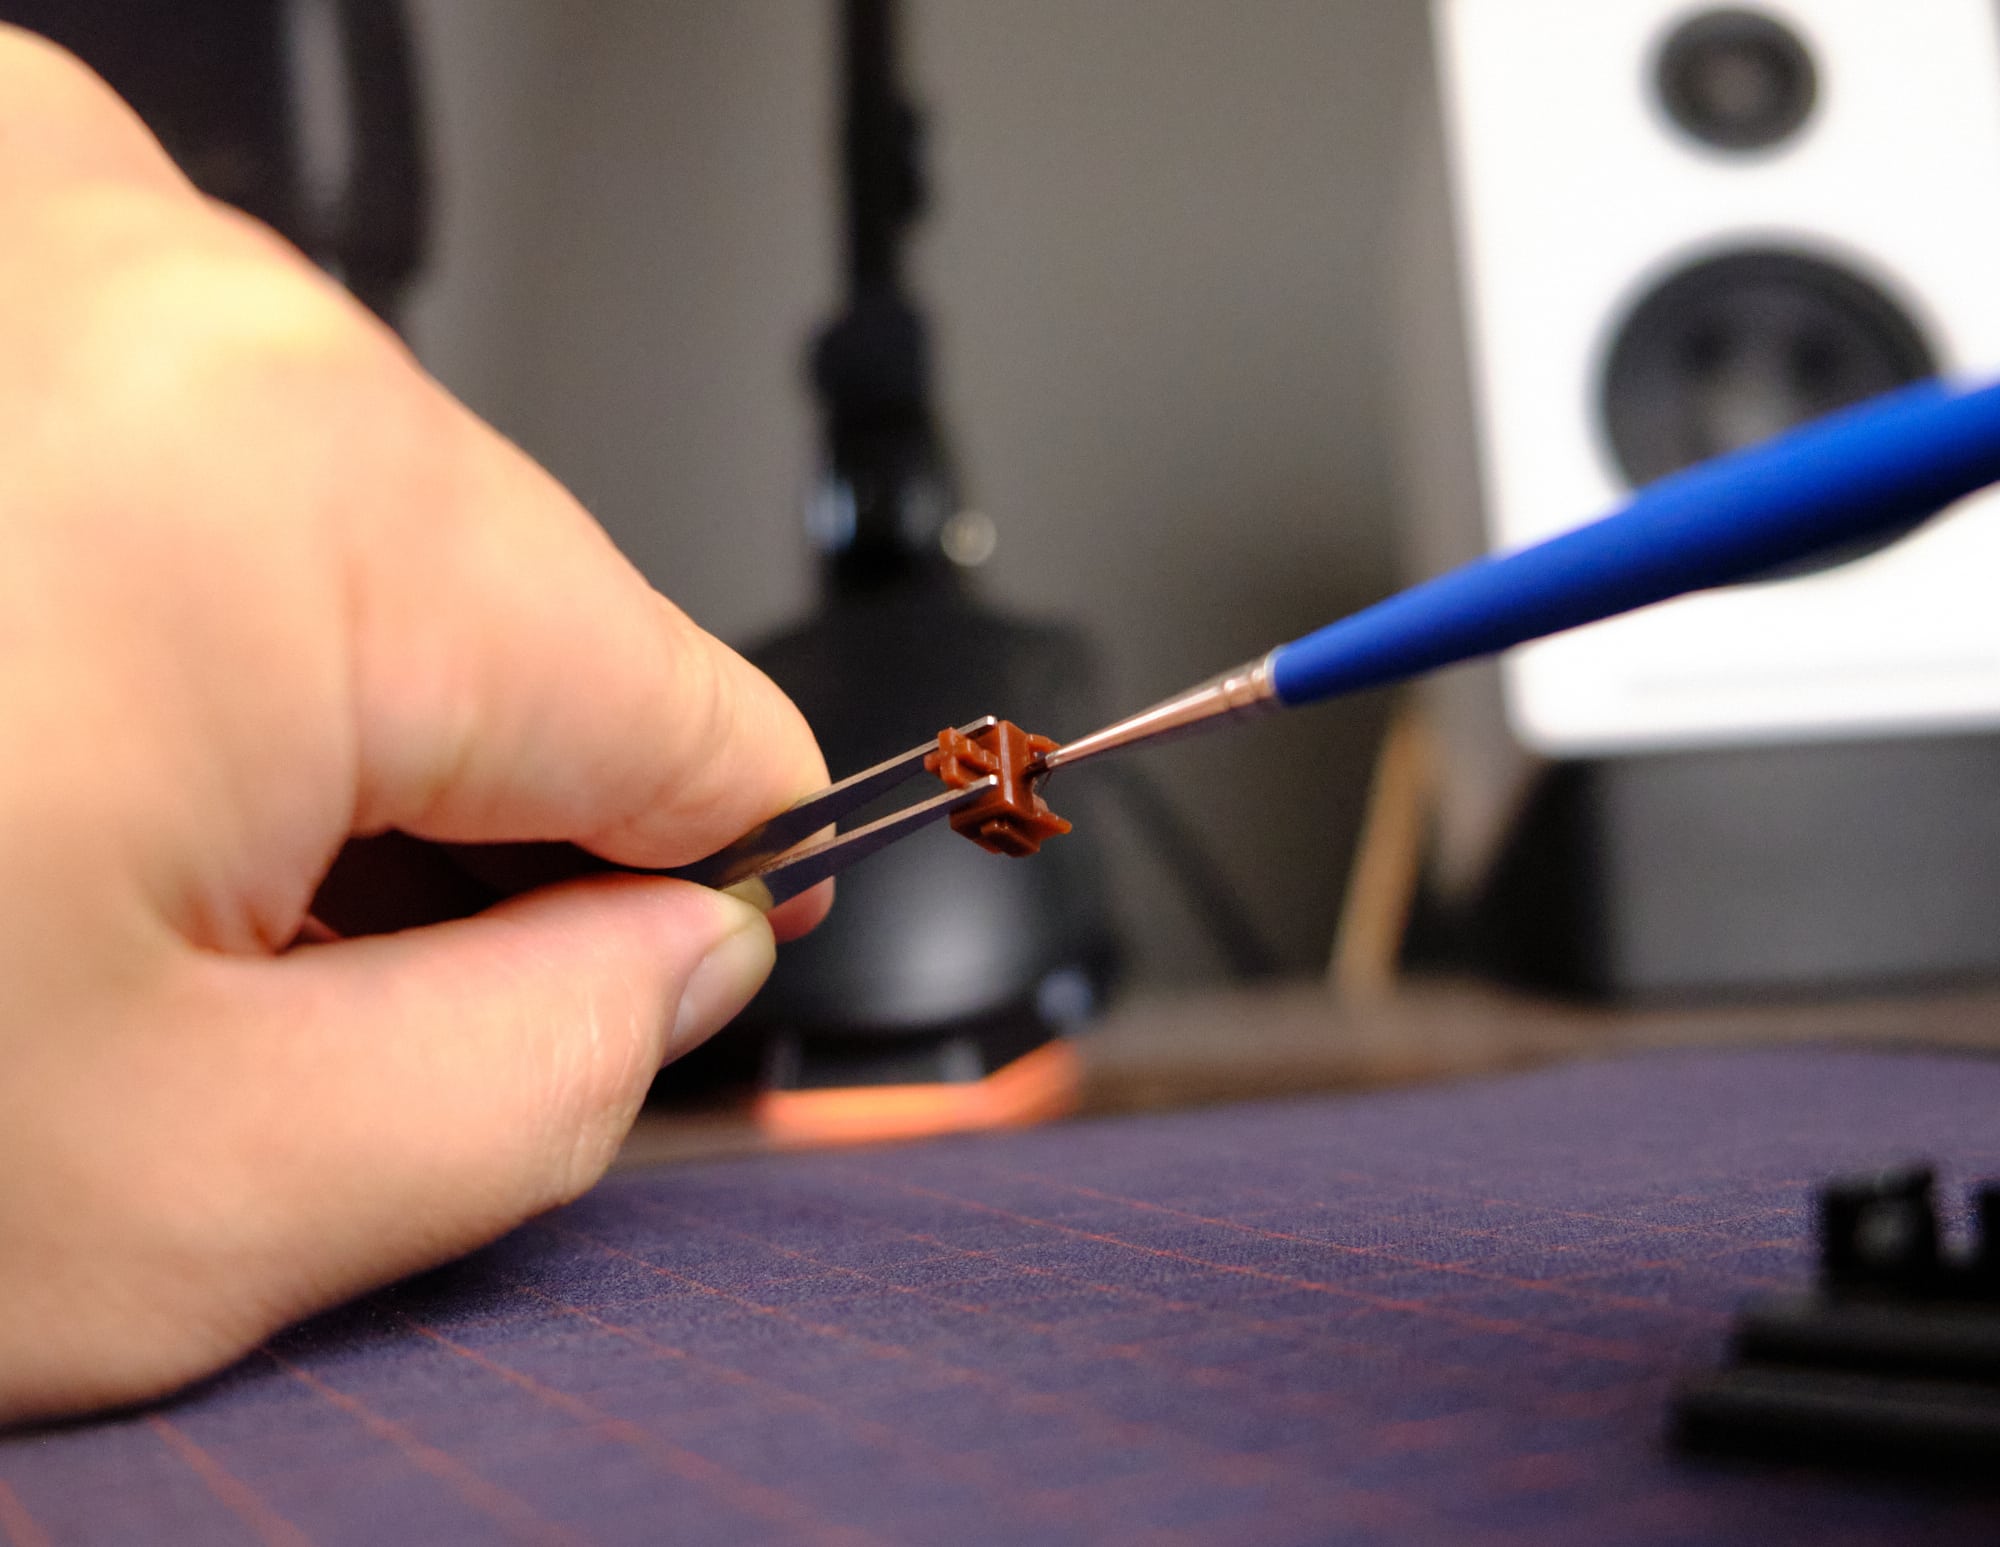
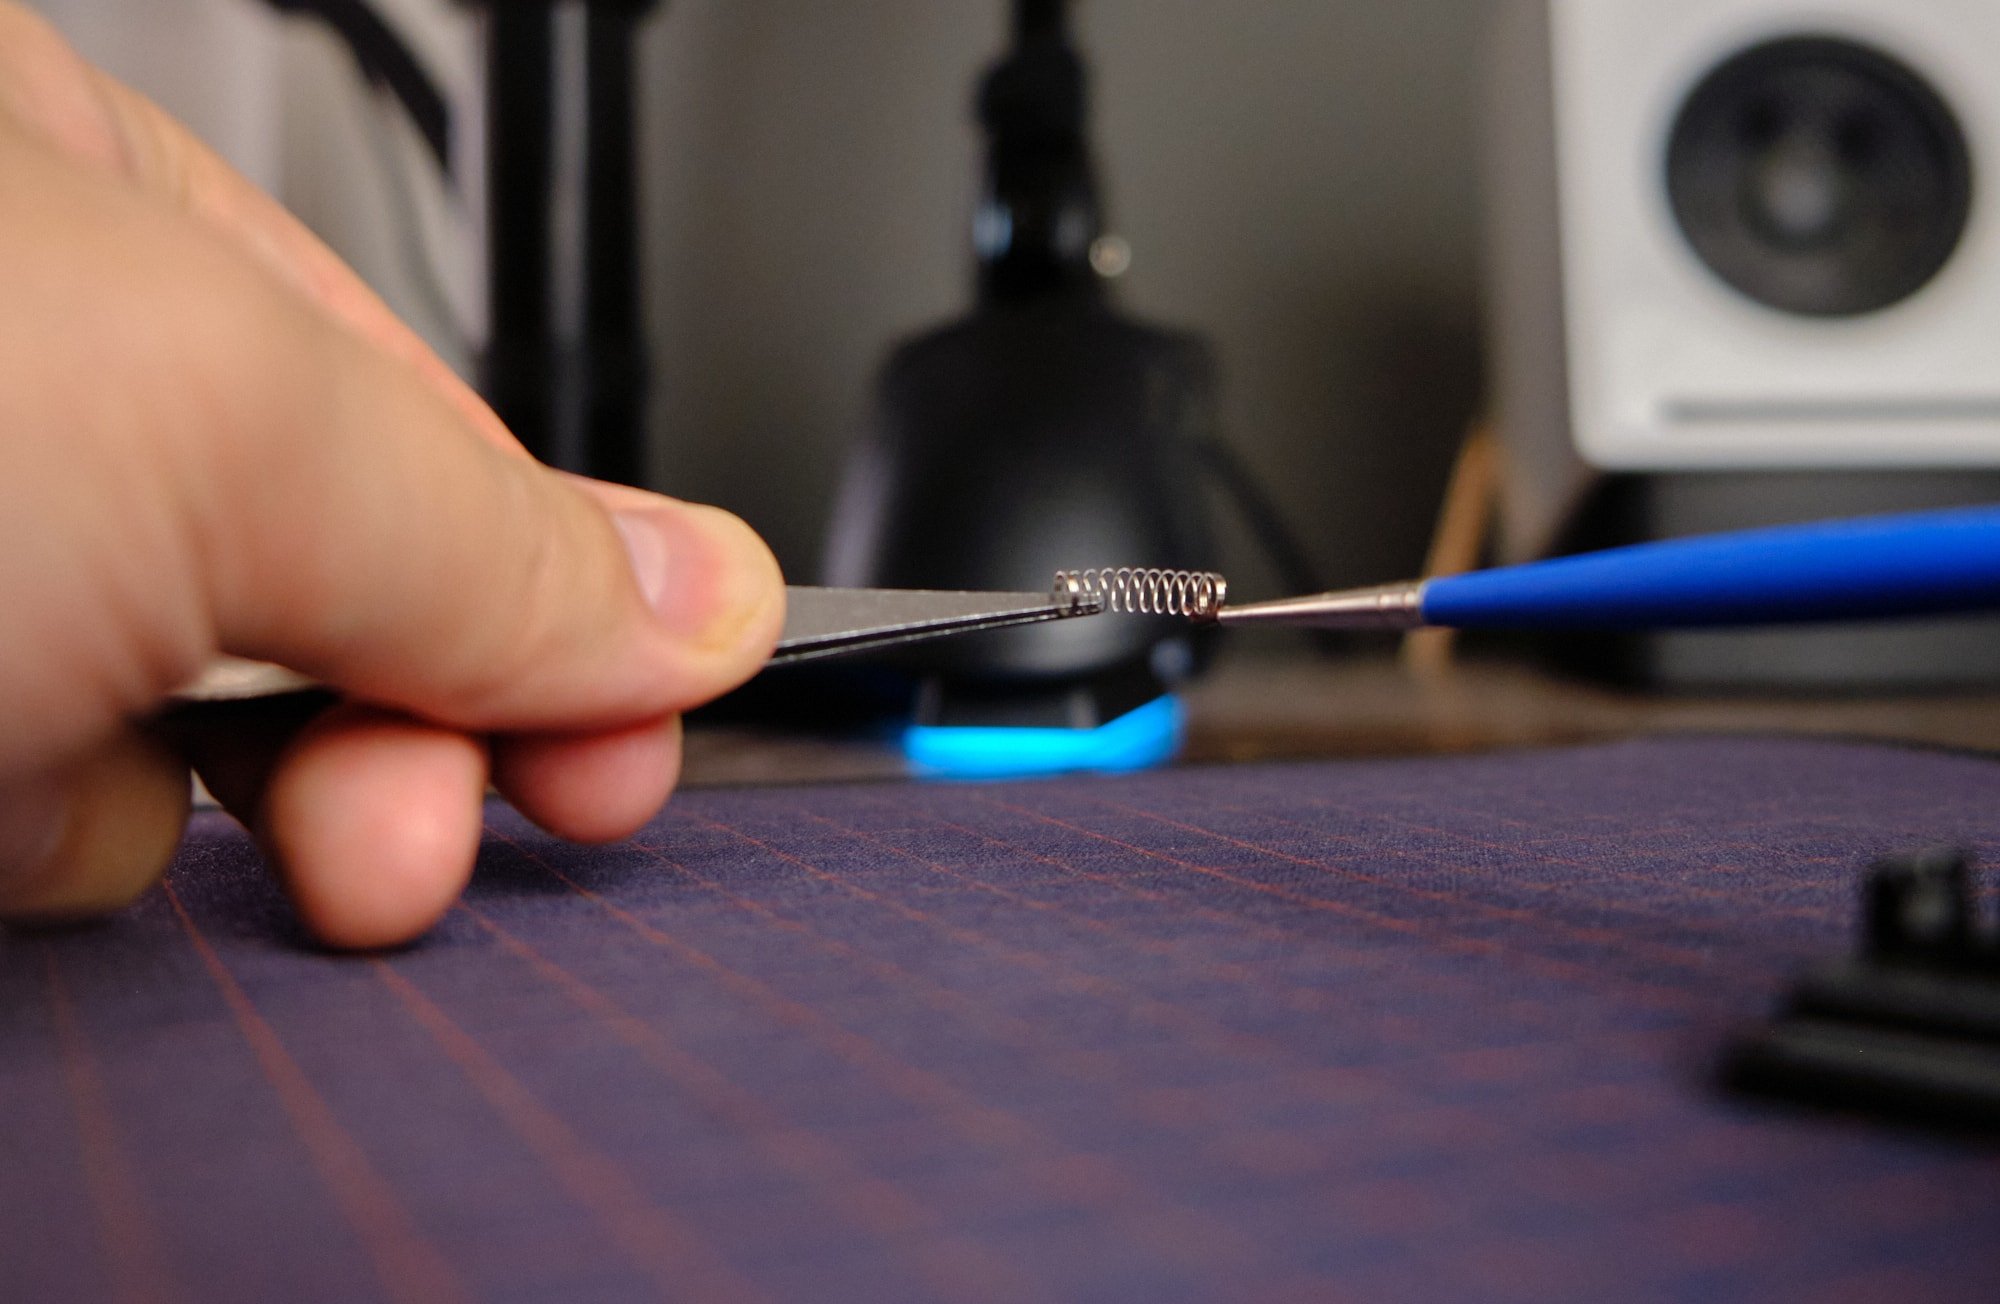
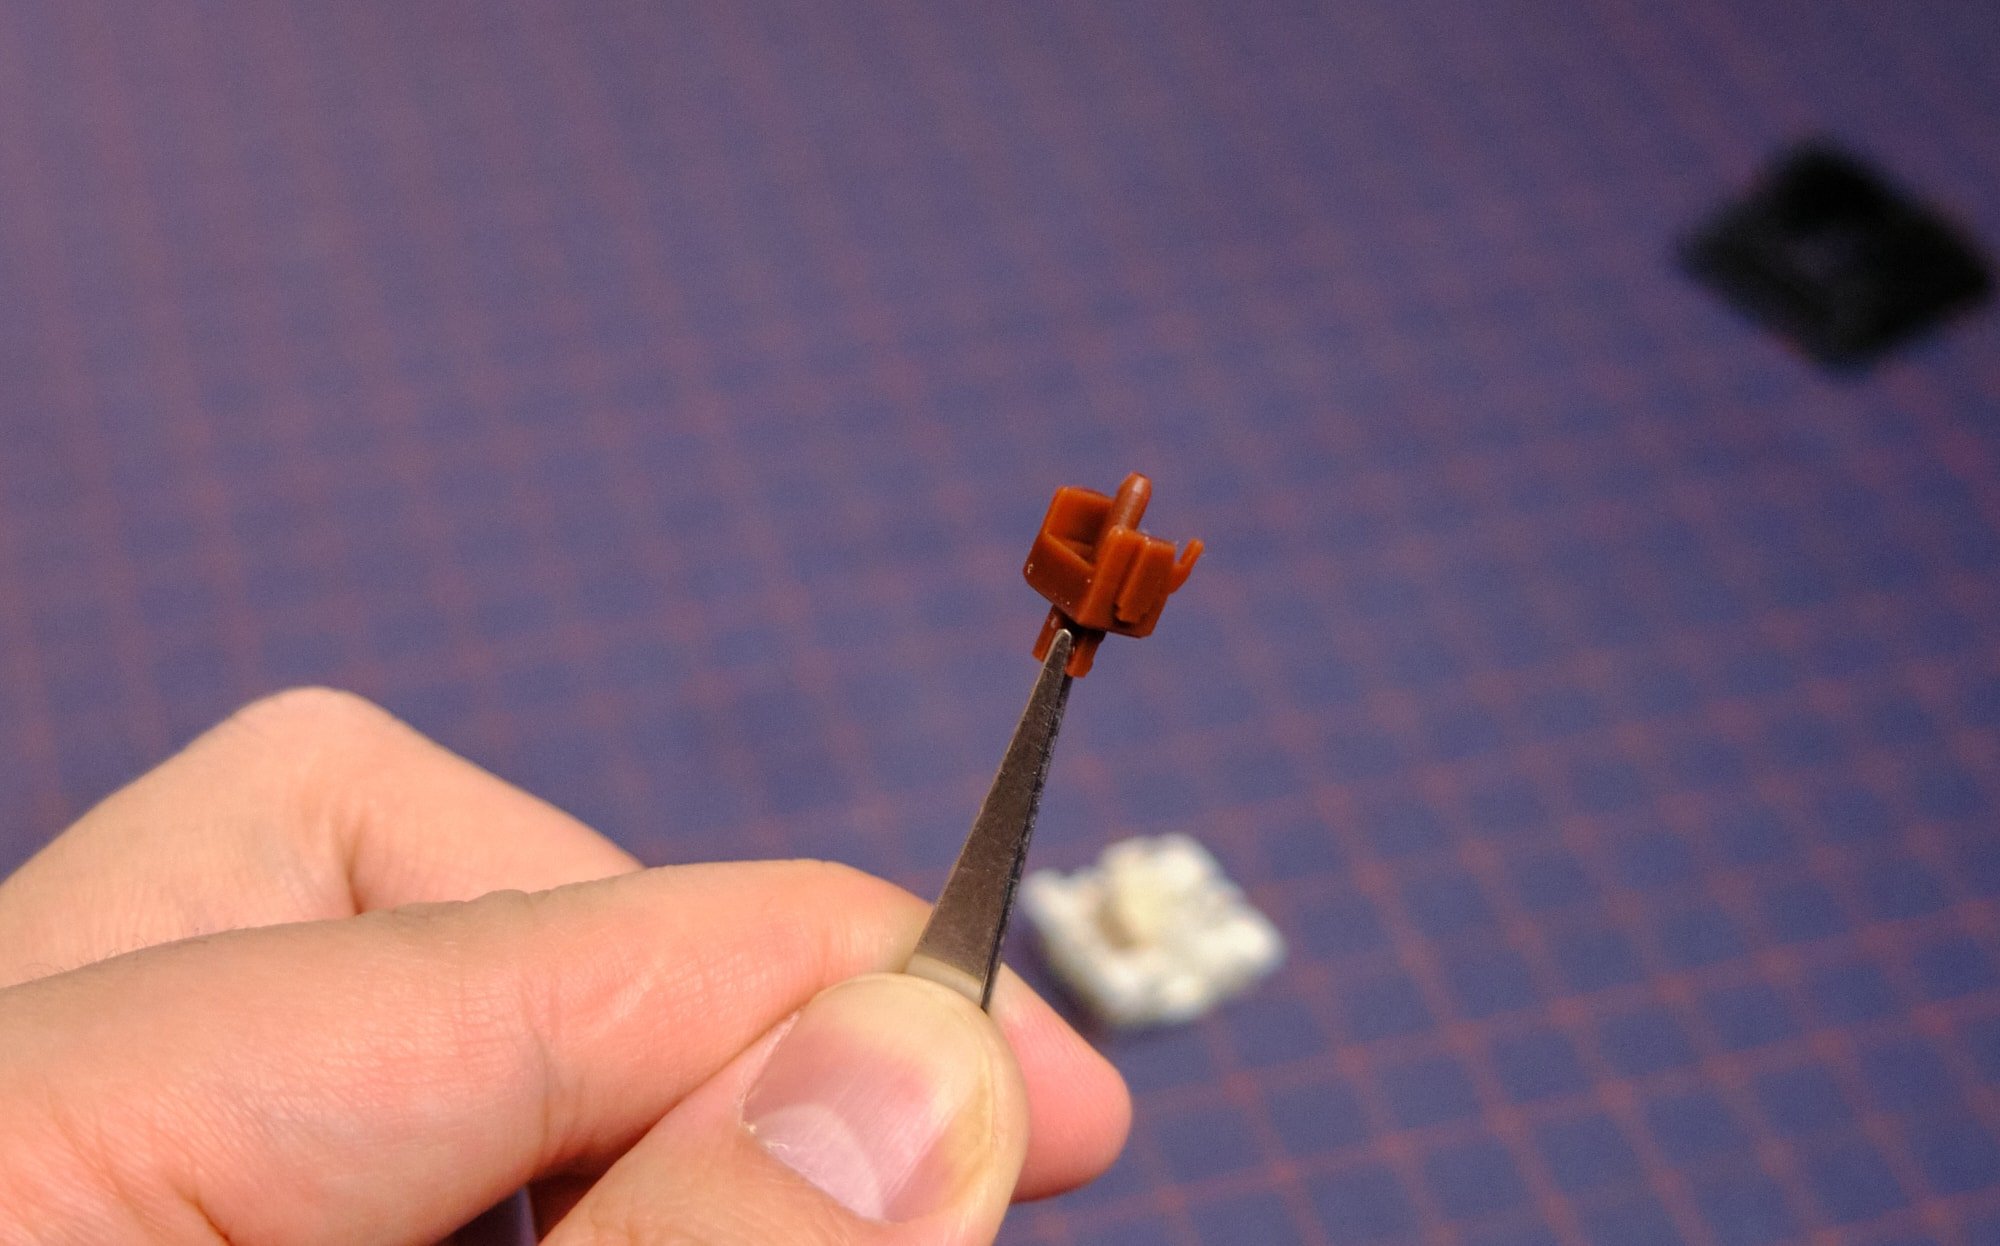
- Tweezers: a pair of tweezers will really come in handy when you have to pick up all the really small pieces of the newly disassembled switch without getting lube on your fingers.
Apart from these, the most important thing you need to have when lubing switches is a clean working area. Decluttering your workspace is a must on basically every kind of job, but once you have hundreds of springs and switch pieces lying around, you’ll be glad you cleaned up your desk.
Parts of a Keyboard Switch
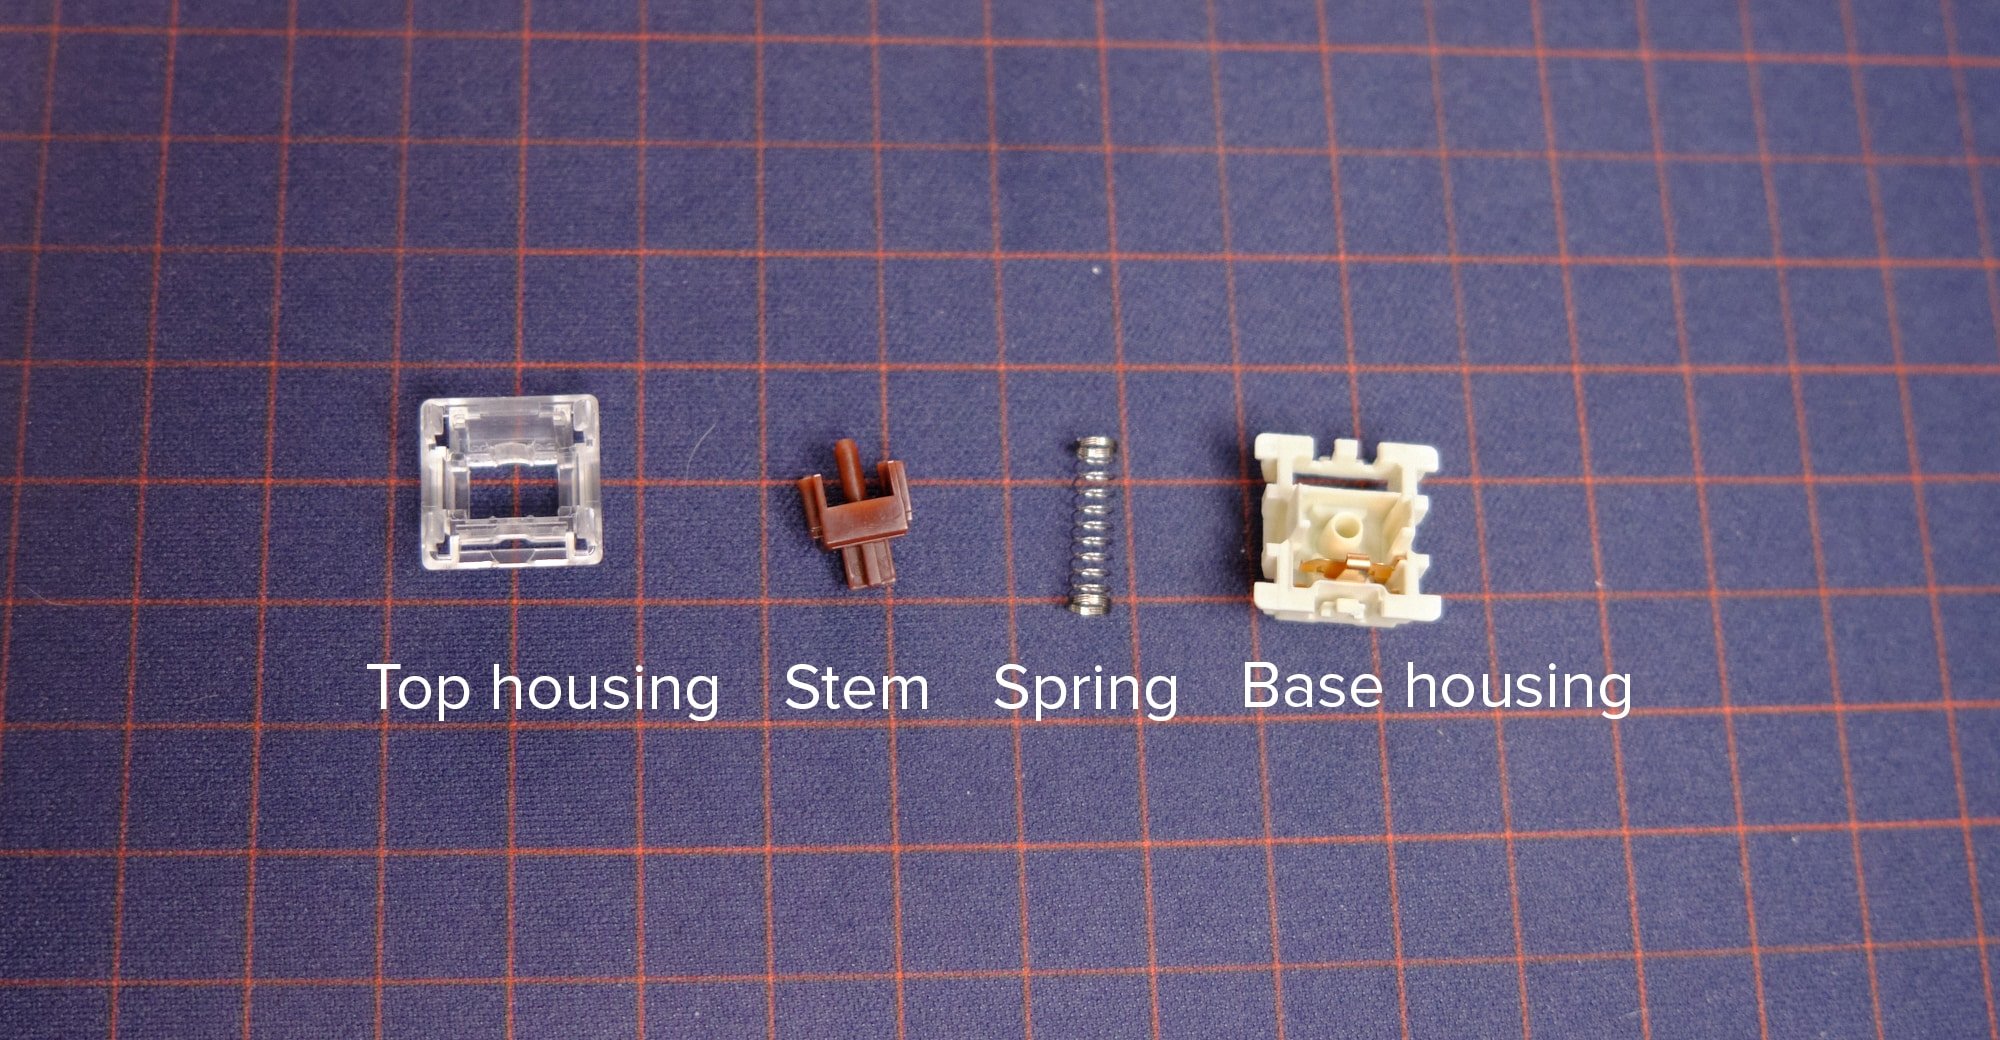
It’s important to familiarize yourself with the inner workings of the key switches once you take them apart. This will help you put them back together easily since you can logically understand where everything goes.
- Upper Housing: this is the topmost covering of the switch that holds all the pieces together. It also helps to guide the stem when the key is pressed and makes sure the actuation force travels downwards.
- Stem: this is the component that moves around inside the switch, and it’s the elongated stick that connects to the keycap on its topside. The stem carries the actuation force of a keypress and connects it with the crosspoint contact. The stem is also what differentiates linear, tactile, and clicky switches according to their feel and sound.
- Crosspoint Contact: this is a pair of metal “leaves” that close upon contact with the stem. The closing of the crosspoint contacts generates an electrical signal that travels down to the PCB which eventually gets relayed to the computer and registered as a keystroke.
- Coil Spring: this is located at the bottom of the key switch, and it regulates the actuating force required to register a keystroke. By varying the springy-ness of the coil spring, switch manufacturers can determine the exact force you need to apply to press a key.
- Bottom Housing: along with the upper housing, the bottom housing clasps all the other components of the key switch together. It also has a passthrough for the crosspoint contacts to connect and send signals to the PCB.
How to Lube Your Switches
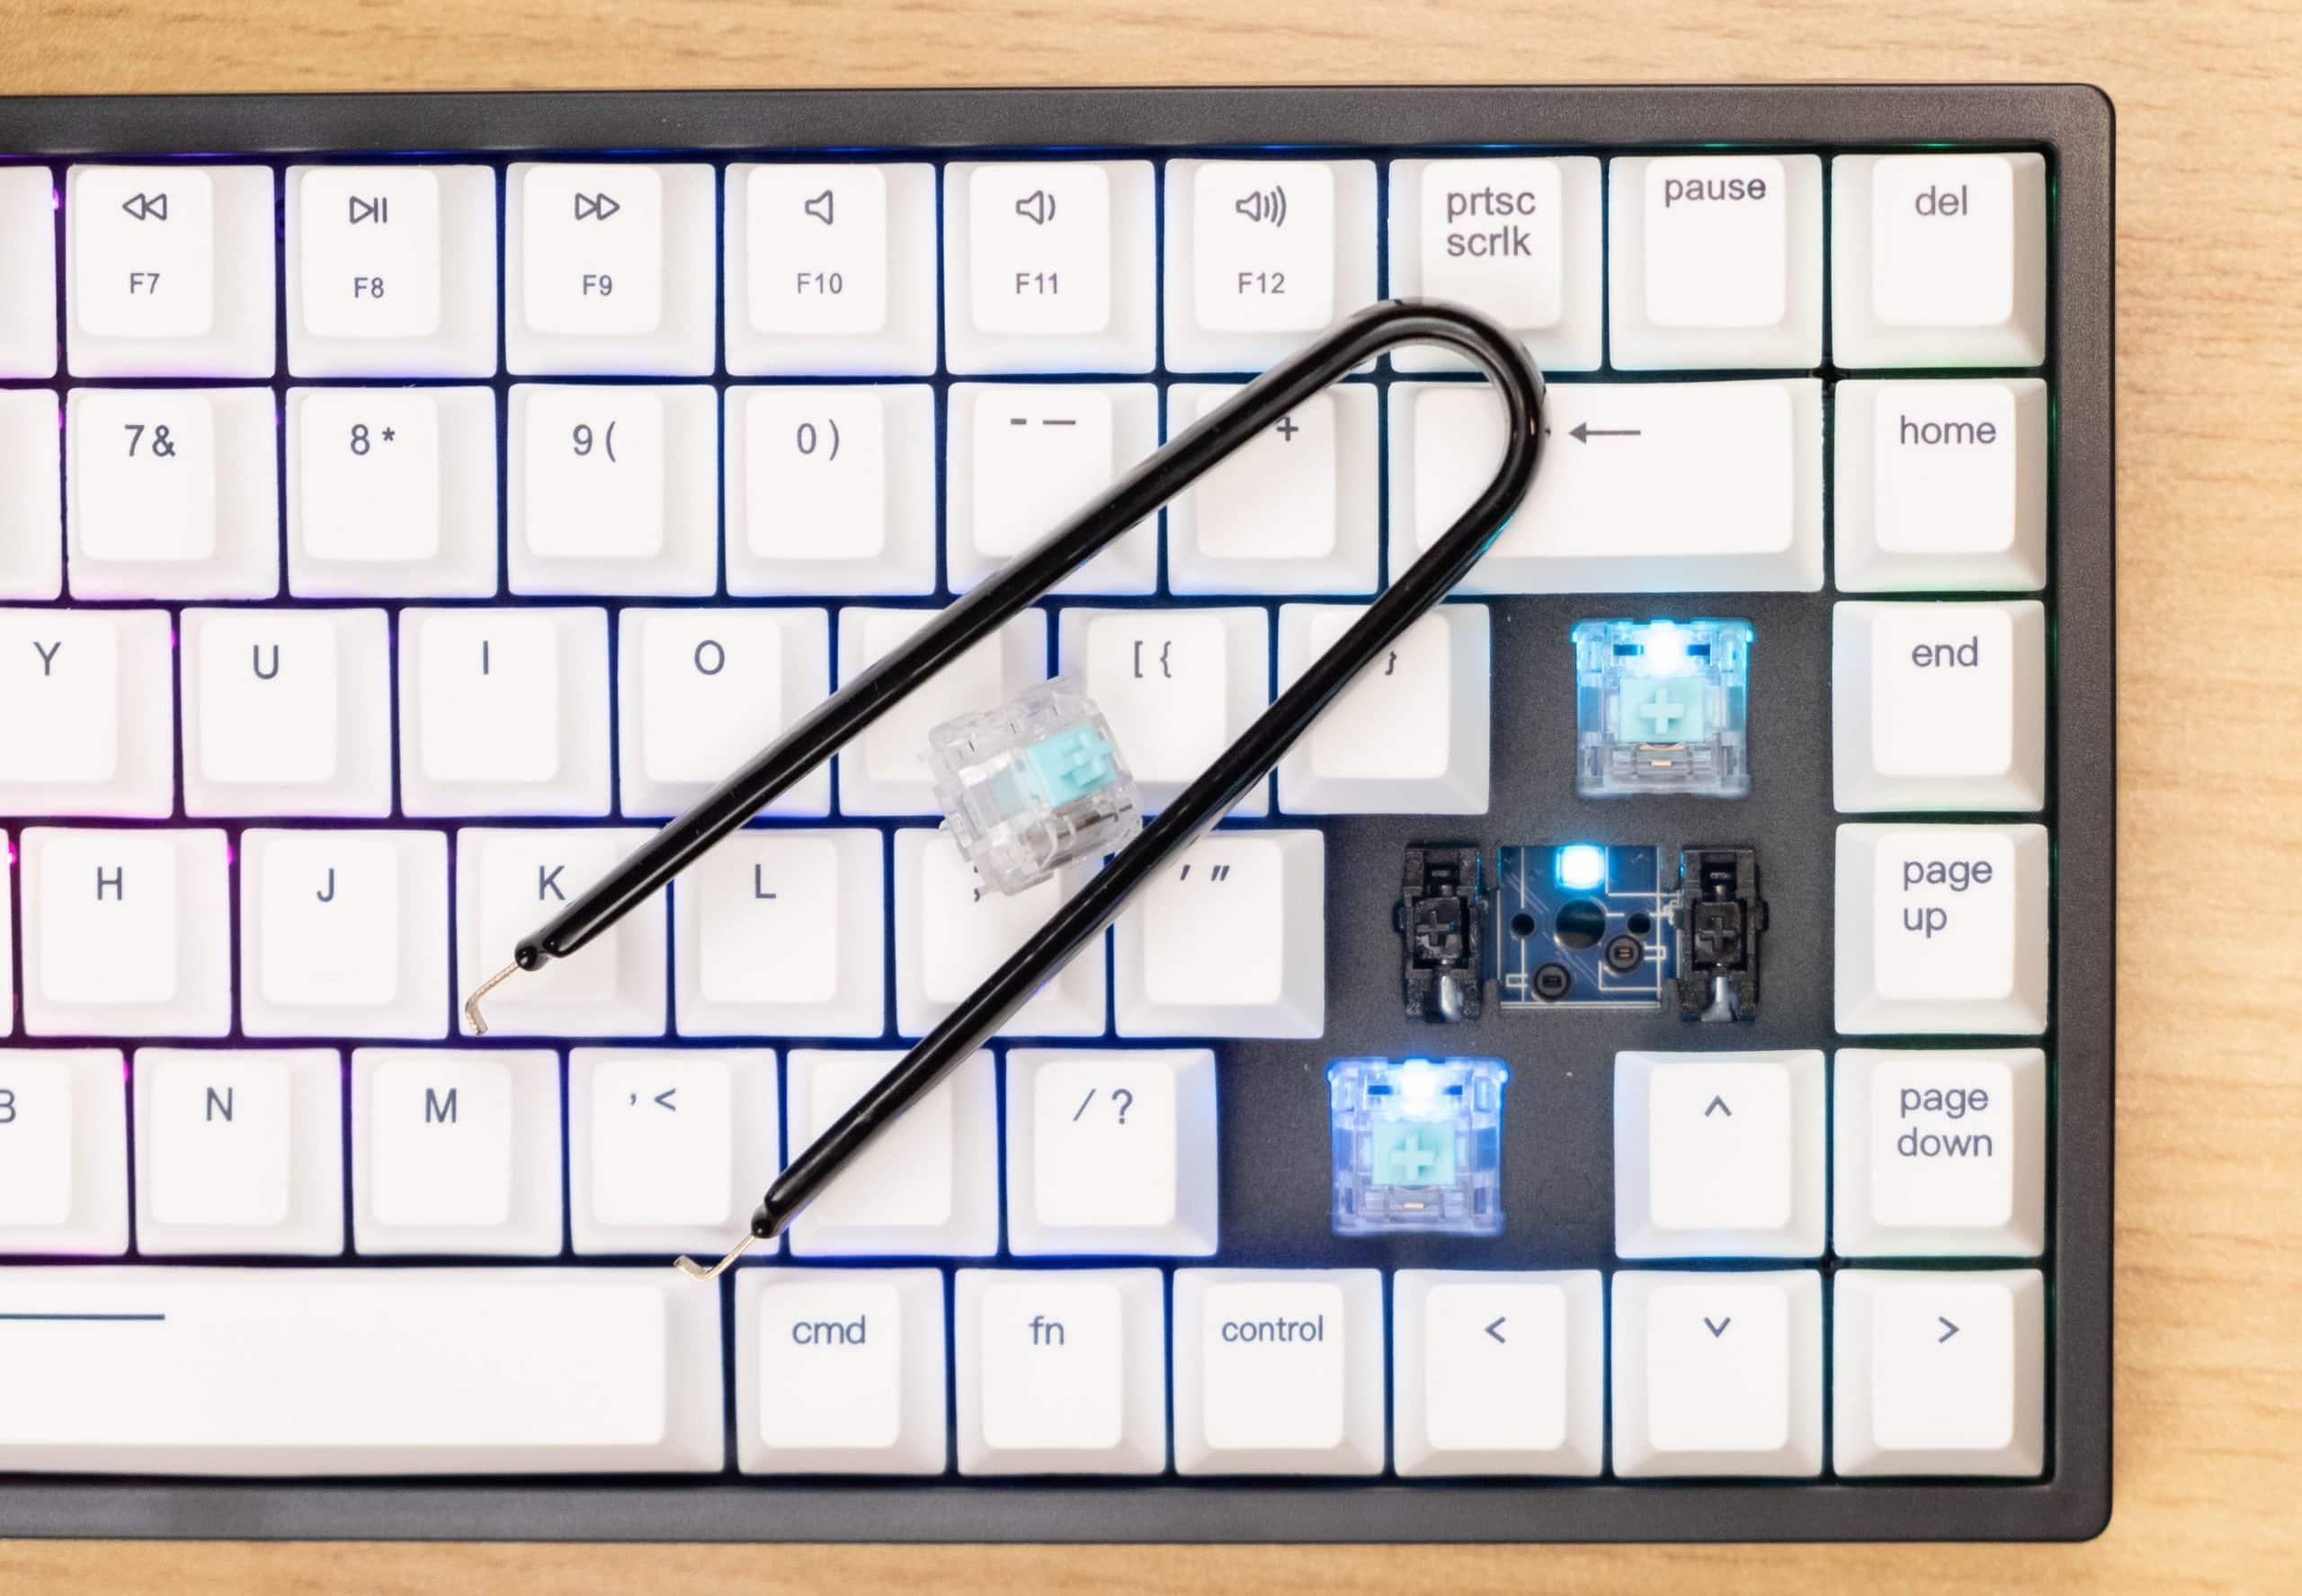
- Remove the switches from the keyboard as mentioned earlier.

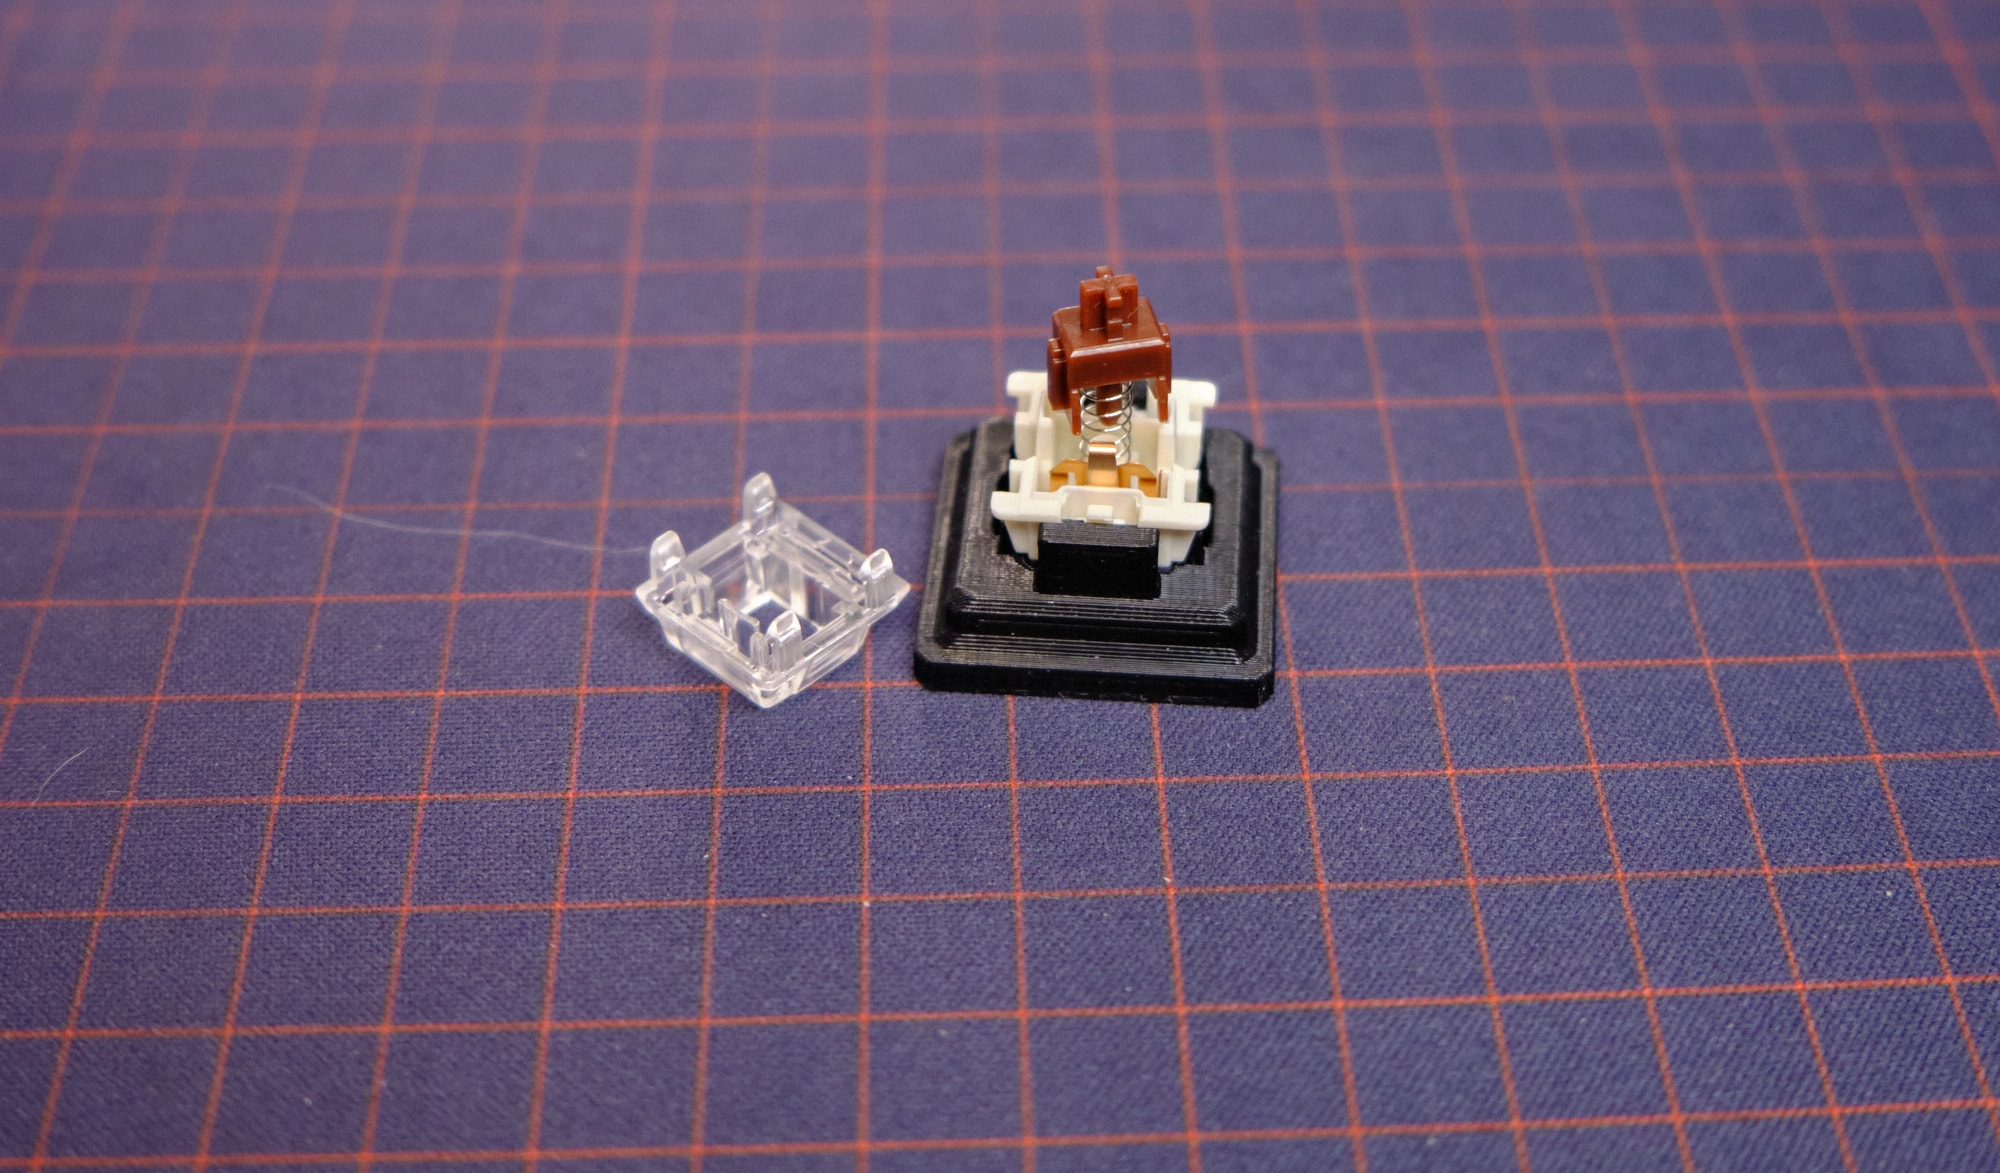
- Open up the switches using a switch opener or flathead screwdriver.

- Lube the bottom housing. Try to stick to the inside of the housing where the stem hits, and avoid the metal contacts as it might damage the switch.

- Lube the Stem. Use the paintbrush to apply the lube to the rails and the area where the stem comes into contact with the spring. You can also lube the stem legs, however, if you’re using a tactile switch, lubing the legs might lessen the tactile bump.

- Lube the Spring(s). This can be done in two ways. If you’re using grease, use the paintbrush and individually apply a healthy amount of lube in and outside the spring. If you’re using oil, go ahead and put all the springs into a bag with some lube and shake it around till they’re well and lubed.

- Lube the upper housing. Simply apply some lube to where the stem comes into the contact with the upper housing and you’re golden.
- Reassemble the switch, taking care to not bend the crosspoint contacts. Make sure you put the spring back in the way it was before. Once everything is in place, snap the upper and bottom housings together, and voila!
- Reinstall the switches onto the keyboard by either pressing them in (for hot-swappable boards) or re-soldering.

That’s it! You’ve successfully lubed your keyboard switches. All that’s left is to plug in the keyboard and load up a key tester software online and make sure all your switches are working as intended.
Diagnosing Issues
Once you’ve reassembled your keyboard, it’s common to run into a range of issues with your newly lubricated switches. Below are some of the most common problems you might run into after lubing.
Mushy keys
If your keys feel mushy and unsatisfying when you press them, the chances are that you’ve applied too much lube. Don’t worry, there’s only a very little chance of permanent damage to your switches. Simply take a q tip a wipe off excess lube after taking apart the keys again.
Loss of tactility
If your tactile switches lack their tactile bump after lubing, you’ve most probably applied lube on the legs of the stem and the leaf. Wipe off any lube you see on these areas and your switch will return to its tactile glory.
No longer registering keypress
Having one or more of your switches not register keystrokes is probably the scariest feeling after you’ve freshly lubed them. This can be due to multiple reasons, and the only way to narrow down the issue is by process of elimination. First, use a different switch that works and replace the unresponsive switch with it. If the new switch works, your PCB is not the issue (phew!). Next, make sure the pins on the switch are straight. If not, readjust them and reinsert the switch into the PCB. Most cases of switches not working is due to bent pins, so straightening them will often do the trick. If that doesn’t work, reopen the switch and see if you’ve lubed over the crosspoint contact leaves. This causes conductivity issues and stops the electrical signal from reaching the PCB. Wipe off the leaves using some rubbing alcohol on a q tip and test the switch. If that doesn’t work (which is very rare), then unfortunately you might have a dead switch.
Switch no longer smooth
If your switches feel very rough and scratchy upon pressing them, you probably have missed some areas when lubing. Reopen the switch, use isopropyl alcohol, and wipe off the lube you already applied. Re-lube the switch and test if the problem persists. In most cases re-lubing the stem and springs will solve the issue.
Can I use other things to lube? Like oil or Vaseline?
The short answer is: don’t. Petroleum jellies and Vaseline tend to degrade plastics over time. While you may be alright for a while, the risk of damaging your switches or even your board is too high. It’s definitely not worth the risk as a tub of Krytox or dielectric grease only costs around $10. It’s always better to be safe than sorry.
Why Lube a Keyboard Switch?
Before we get into the how let’s first talk about the why. Why should you even have to lube your mechanical switches? What does lubing even do?
All these are good questions that you should probably know before prying apart your precious Glorious Pandas.
Most mechanical keyboard aficionados lube their switches as well as the key stabilizers to make them feel and sound better. Adding lube to the key joints inside the switch, and on the spring makes them a lot quieter. Lube helps the switch to gloss over any surface imperfections and makes the keystrokes feel incredibly buttery.
Lubing also gives switches a very satisfying feeling when pressed (affectionately called by enthusiasts as thocky). Moreover, you can get rid of the unpleasant, echoey spring grind you hear when most switches bottom out by simply applying a bit of lube on the spring.
It doesn’t matter what type of switches you have; lubing your switches is a must.
Now some switch manufacturers do pre-lube their switches out of the factory. But more often than not, they do a pretty lackluster job. In all fairness, this is more than fine for the uninitiated. But as an enthusiast, I cannot in good conscience recommend not lubing switches yourself. As a rule of thumb, always lube your new switches before beginning to use them. Plus, you should not have to re-lube your switches later on as long as you use a high-grade lubricant.